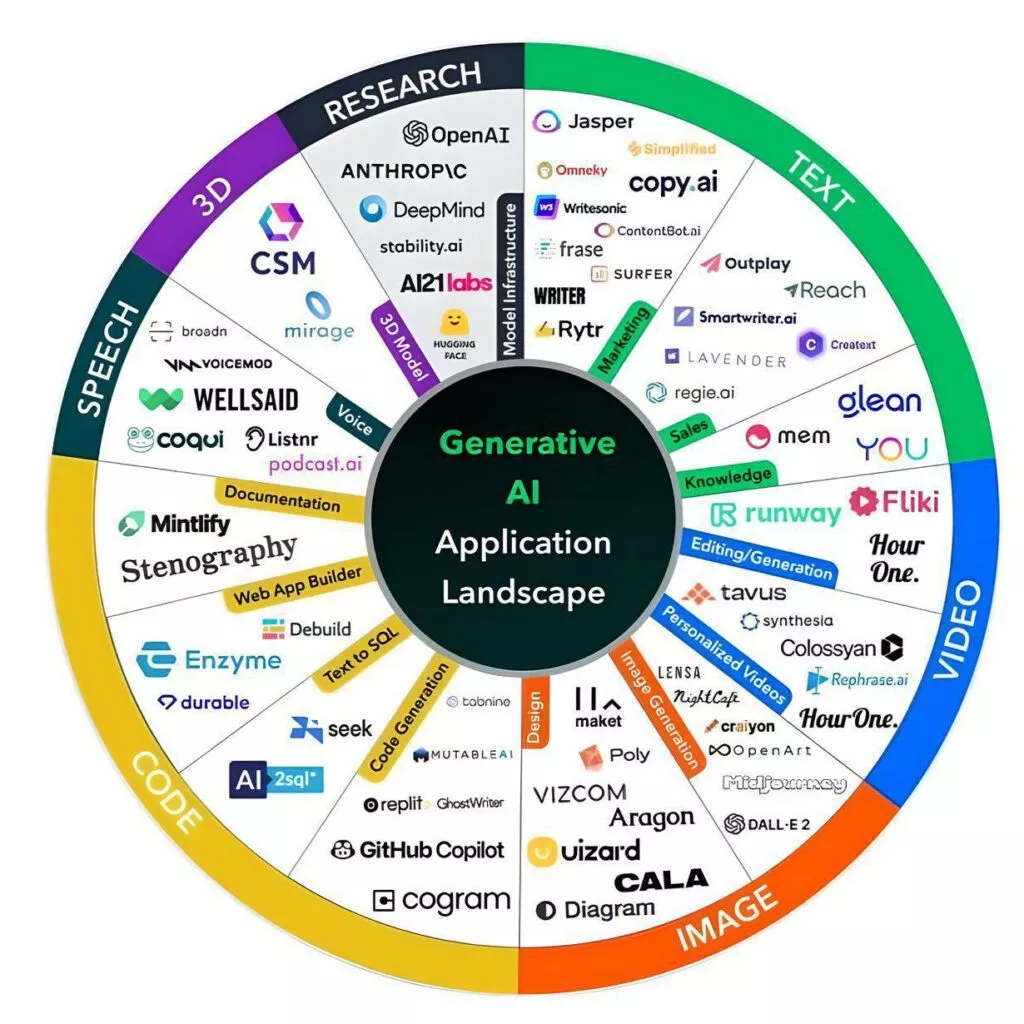
The best neural networks in their categories are in the most detailed diagram of such.
We save and use it.

Traffic arbitrage is the redistribution of traffic for the purpose of earning money. The arbitrageur buys and sells traffic. Balancing between the funds spent and the profitability is the basis of arbitrage
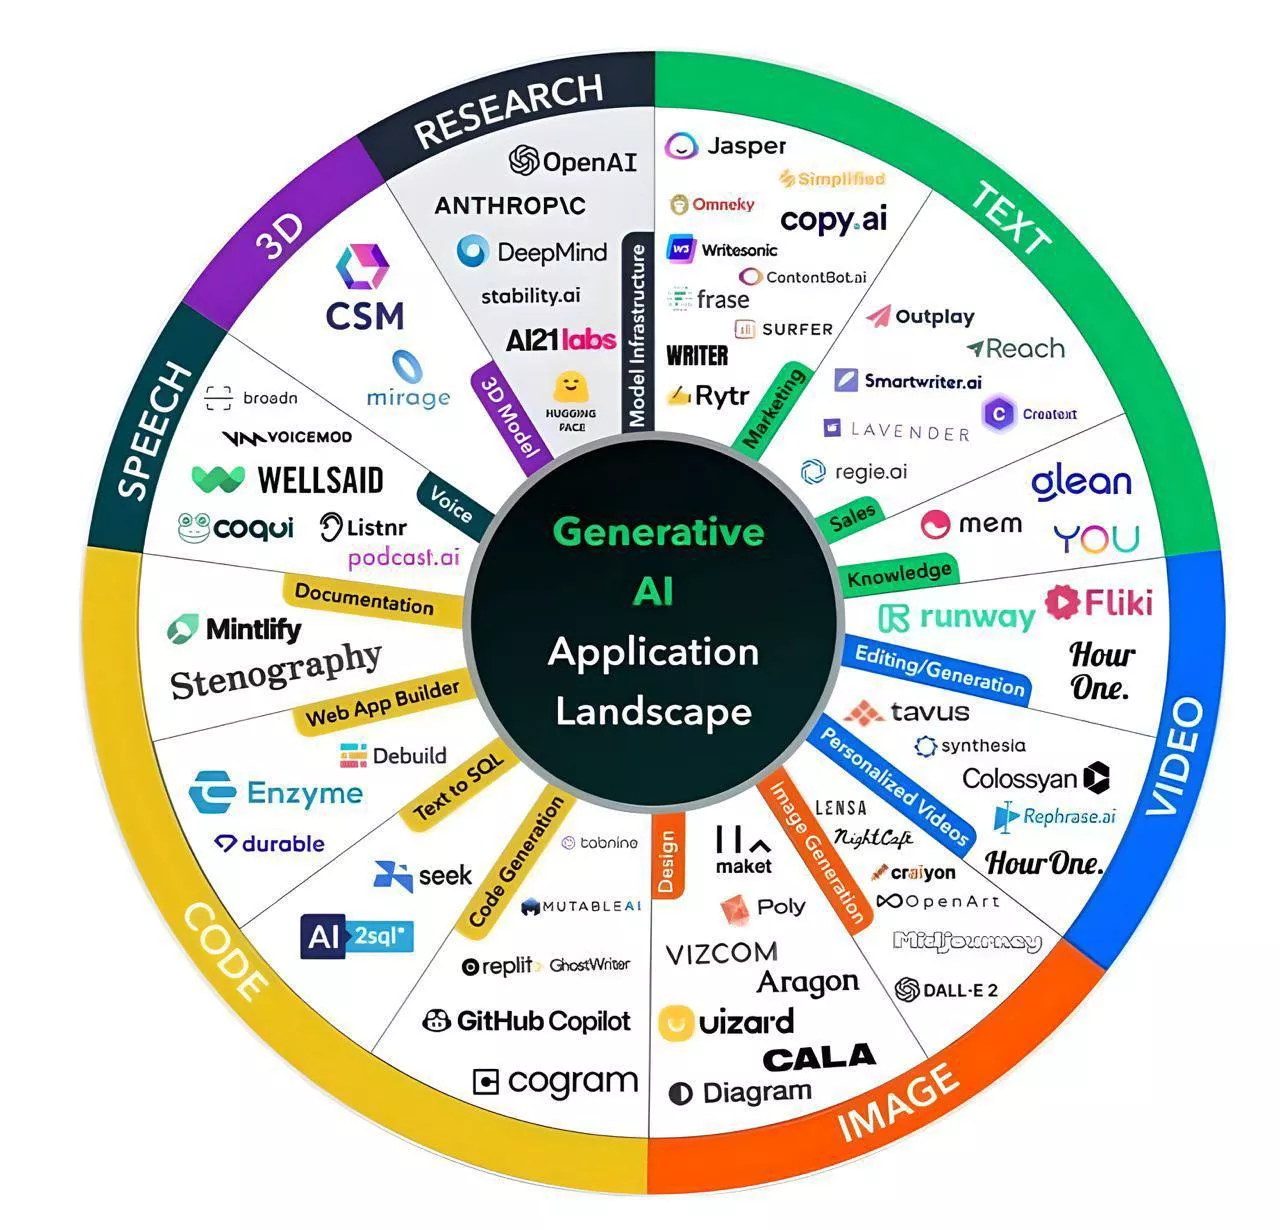
The best neural networks in their categories are in the most detailed diagram of such.
We save and use it.
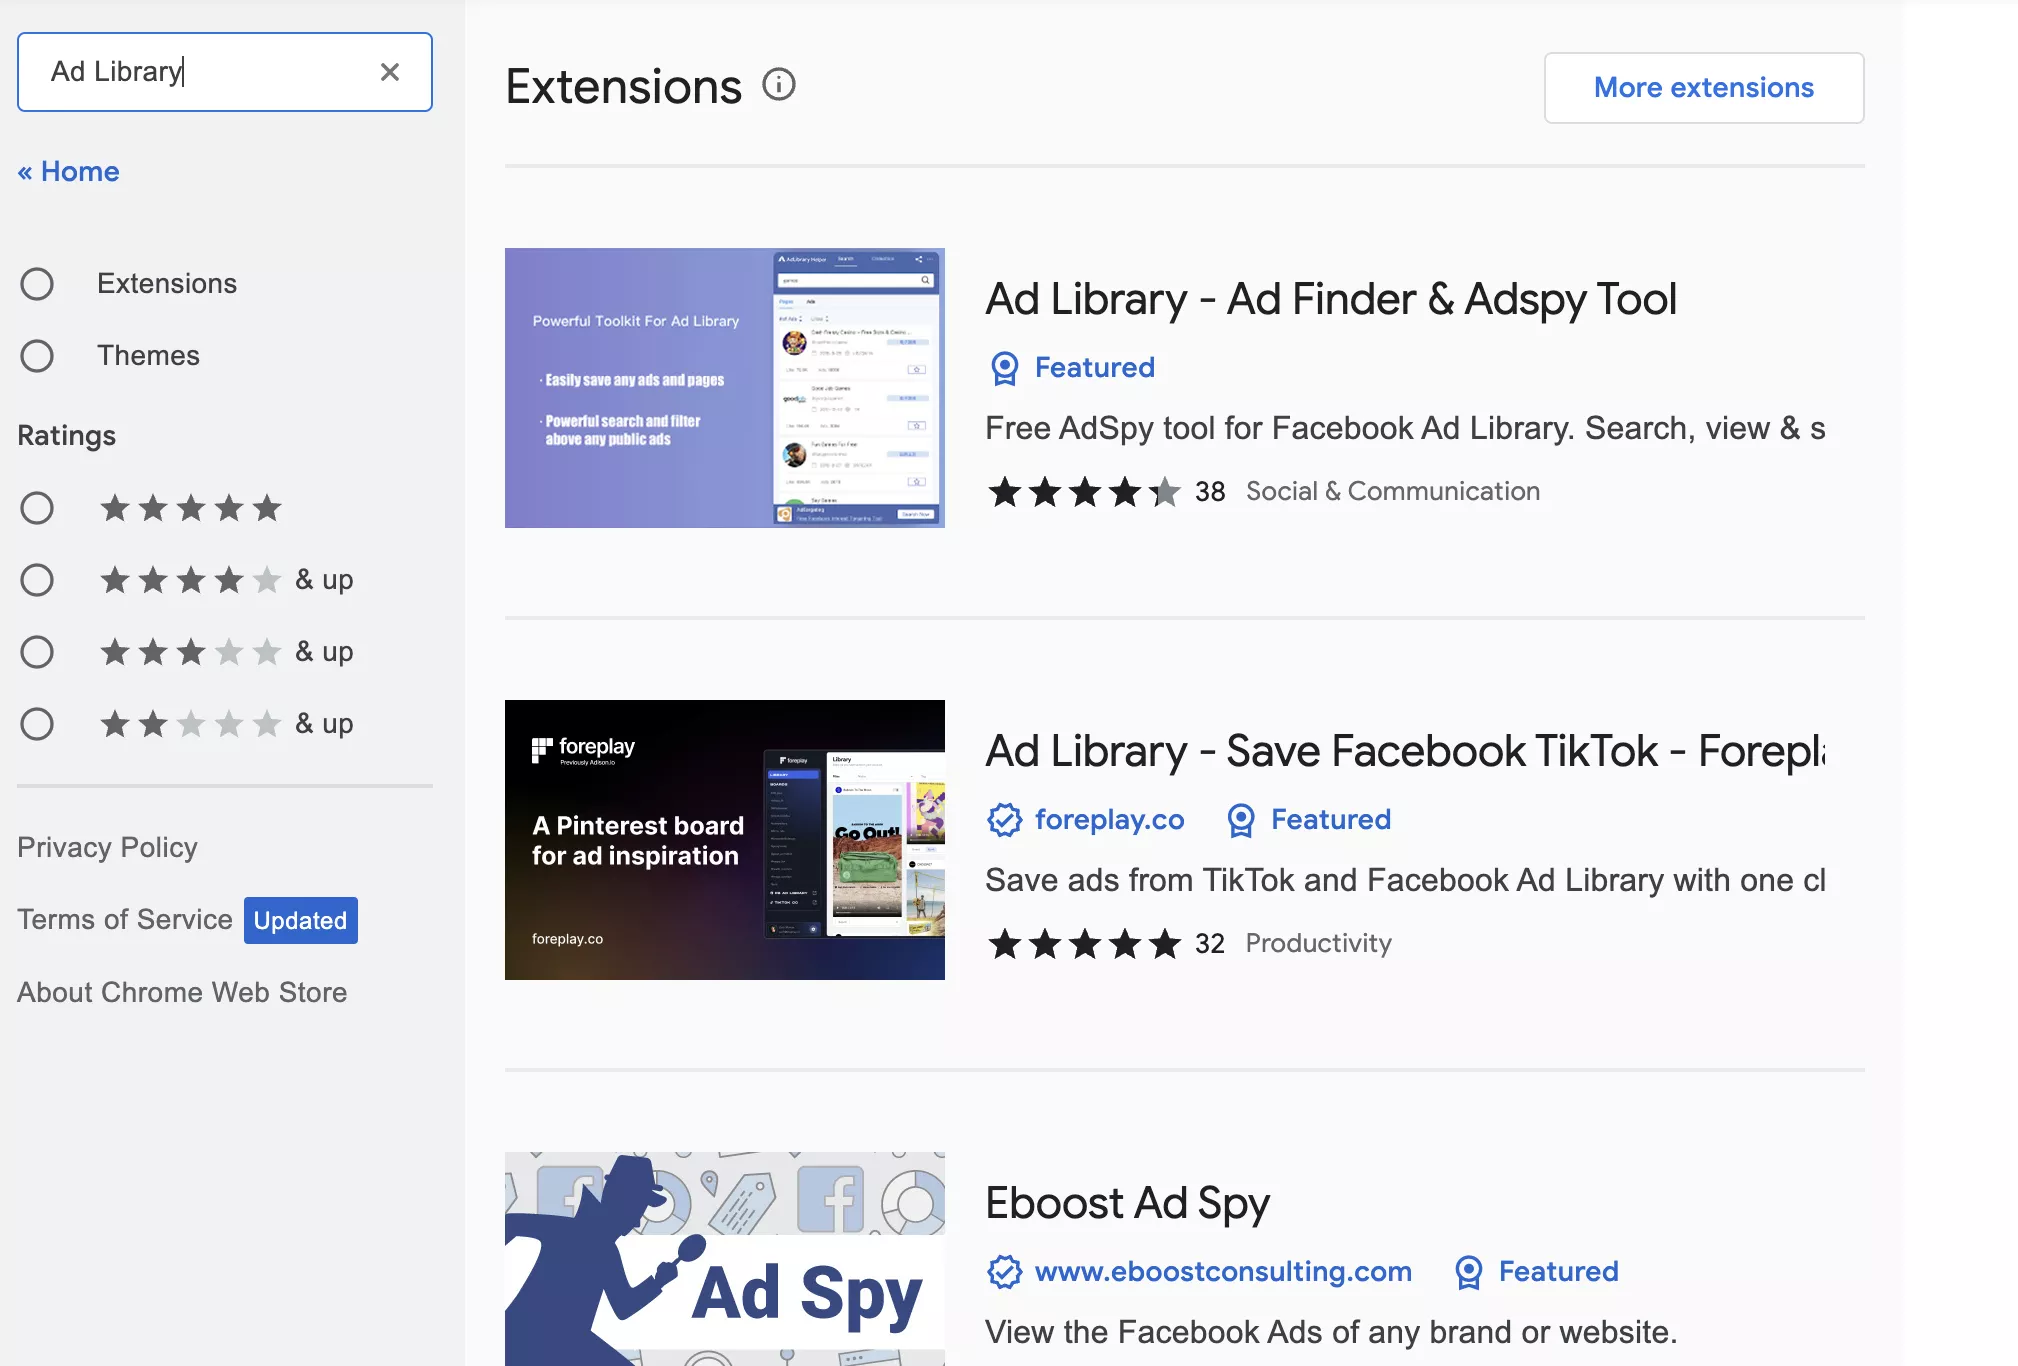
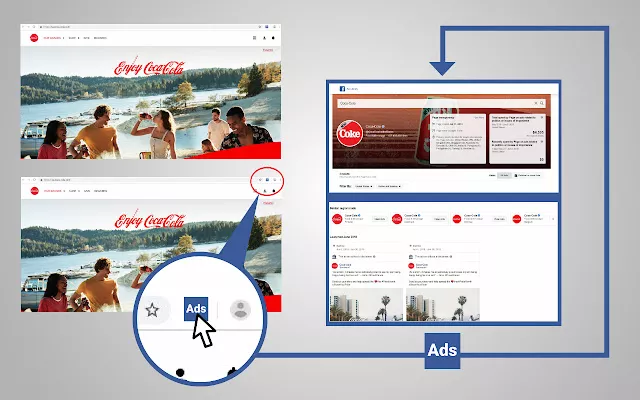
A selection of useful extensions from the Chrome Ad Library online store for working with Facebook.

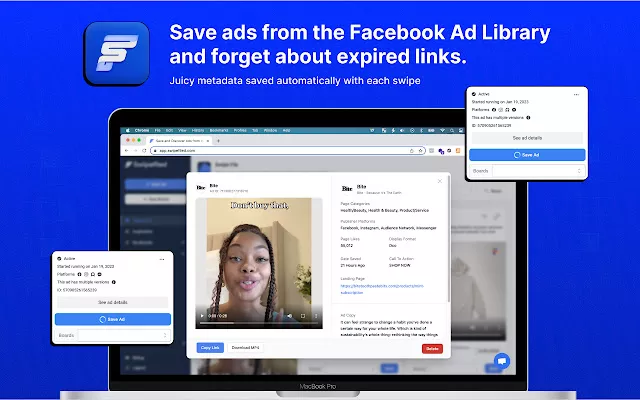
Ad Library – Save Facebook TikTok – Foreplay
Link to the website: https://foreplay.co
Install the extension: https://chrome.google.com/webstore/
A plugin from the Foreplay service that allows you to save ads from TikTok Creative Center and Facebook AdLibrary to your library in the service’s personal account in 1 click.
Foreplay allows you to conveniently organize advertising creatives on boards, view detailed information on them, download or share with your team.
Of interest, the service has a section with advertising creatives that other users have found. They can be sorted by niche, format, platform, language, status.
Tariff plans
The service is paid, but after registration, a trial is given for 7 days.
Key features of the Foreplay service
Additional features
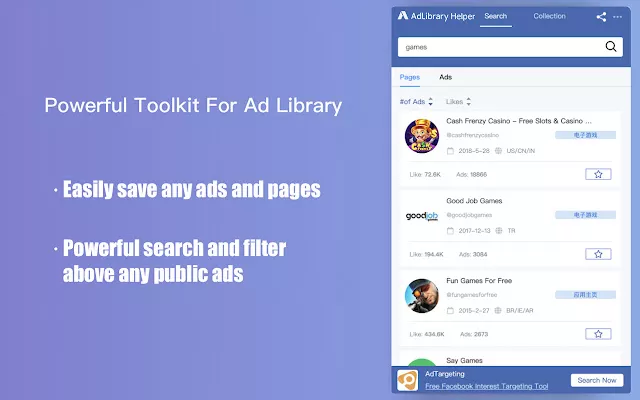
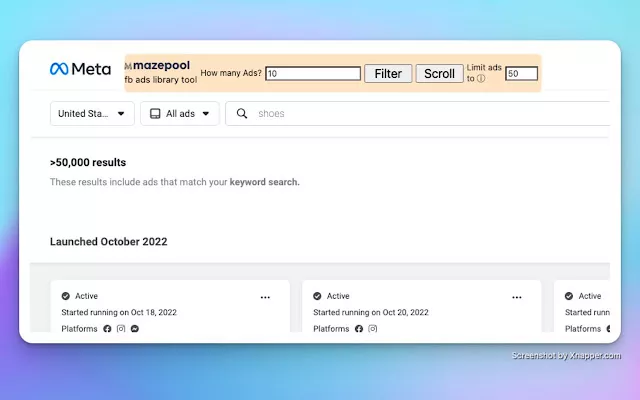
The AdLibraryHelper plugin from the BigSpy spy service is a convenient and free tool for quick search in Facebook AdLibrary. Allows you to search, view and save ads from any advertiser, even without going to the library. When you click on the found creative, the “See Ad Details” button throws it to the BigSpy spy service, which we have analyzed in detail in our review.
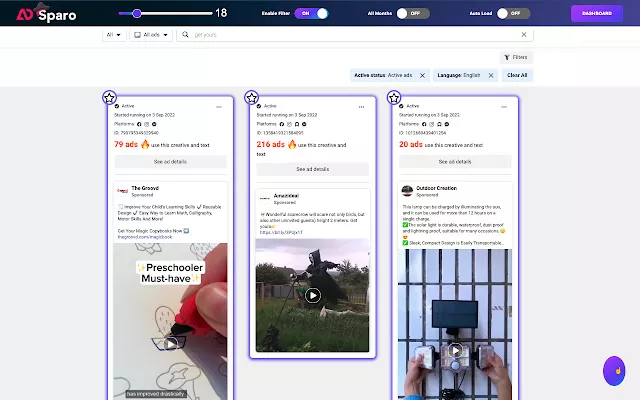
An add-on to Facebook AdLibrary, from the free spy service AdSparo.
Main features
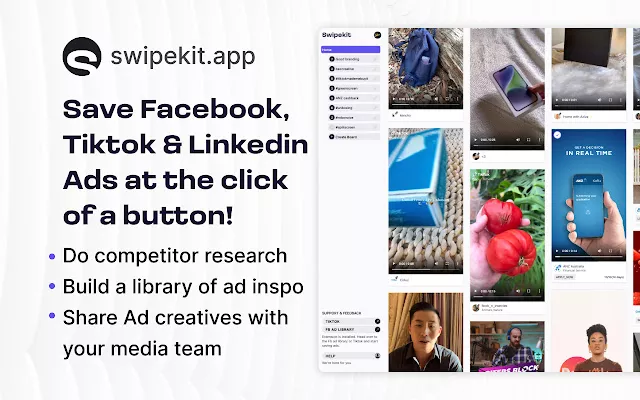
Browser extension from the Swipe file d service, which allows you to save ads from Facebook AdLibrary to your library in your personal account in 1 click. The functionality is similar to the Foreplay service.
Main features
Tariff plans
There are free and paid tariffs, after registration, a trial for the Professional tariff is given 7 days.
Another organizer with minimal functionality for the ads found in Facebook Add library and TikTok Creative Center. Allows you to collect on different “boards”, assign tags, sort and download.
Rate
$30 per month, there is a trial for 7 days.
A small add-on for Facebook Ad Library.
Functions
The plugin has not been updated for a long time, but some functions still work.

Eboost Ad Spy — allows you to find ads on Facebook of any brand or website with one click.
Just go to the URL of any website you are interested in. If the extension icon turns blue, it means that it has found the Facebook page. Just click the “Advertising” extension icon and it will open the brand’s Facebook AdLibrary ad. If the icon remains gray, it means that the page has not been found.
The extension also works on Facebook business pages in addition to websites. You can go directly to any Facebook page and click on the extension to see related ads.
Buying a domain
Tracker
Server
Spy service
Antidetect
Accounts
In conclusion
Despite regular changes and stricter rules, and the systematic sending of advertising accounts to the ban for no apparent reason, Facebook is still one of the largest sources of advertising. Arbitrageurs appreciate him for the fact that you can work here on almost any vertical, so there is nothing surprising in the fact that many beginners choose him to start. Today we will figure out how much money is needed to start working on the facebook advertising platform. Of course, we will not talk about the advertising budget, but only about tools and consumables.
The domain is required for hosting landing pages. If it is important that the domain name is beautiful, it is not worth saving. As an example, let’s give NameCheap, where it is quite inexpensive to buy domains in such popular zones as .online and .site at an affordable price – only 98 cents apiece on average.
Its task is cloaking, so it is important that the list of functions includes filtering.
To begin with, Binom will be enough, which offers 14 days of free use, then you will have to pay $ 99 each. per month. You can stop at Keitaro, the advantage of which is an affordable price of $ 52, but the disadvantage is that you can use only one domain, so you will have to constantly change it in the tracker. If you choose a more expensive tariff – 94 USD / month, the problem will exhaust itself.
The most inventive beginners can find a free cloaca (there are such). A good option at the time was the “Yellow Web”. The ability to change the code in the right place will allow you to save quite a lot.
Free and paid website traffic tracker
To install a tracker, you can’t do without a server. Each tracker makes requirements for it individually, and they are prescribed in the FAQ. For the purchase of dedicated servers of the required configuration, for example, from FastVPS, you will have to spend a little. The average price is $10. The most affordable option so far is Timeweb with a minimum price of $5. There are other options, it’s worth looking for them.
But the situation with another hoster, which is mentioned in the screenshot above, is somewhat different. DigitalOcean’s VPS is generally free if you register by visiting the website using a referral link. 60 days of using the service will cost only $ 100, which will be quite enough for several months of work.
Speaking in theory, it is quite realistic to do without spikes. Neural networks do a good job of creating creatives, or you can do it on your own. But if you look at things more realistically, the most popular spike called Adheart costs about $ 53. per month, but before paying, we recommend testing the service. It’s free, but you won’t be able to download creo.
However, instead of soldering, some use the Advertising Library in the FB. Although it is not so convenient, it is completely free.
Best ad spy tool | Spy on competitors ads – WebTrafficGuru
At the initial stage, a browser with a tariff of up to a dozen profiles will be enough. They will be enough to study the tool and fill the first RC (the only question is whether they will be profitable). Some arbitrageurs recommend Dolphin{anty}, which provides a completely free tariff for ten profiles when buying the next ten for just $ 10. Incogniton offers something similar. Someone prefers the “Sphere”, the free test version of which is just limited to ten profiles.
Summing up the interim result, we note that the minimum cost of paid tariffs in antidetect is from $ 7.2. per month, the average cost is about $24.
Best browsers for privacy
Here is a simple example. For 1 king, we take 9 autoregs. The cost will depend on the approach – how high-quality the bay should be.
If you take one farm and 9 simple autoregs worth about 35 rubles each, you will have to spend about 10$. When the akki fly to the policy, it will be possible to write an application for unblocking from pharma (you can be sure that there will be a ban). At best, you can cast about $ 500 from the described setup, but taking into account rejected creatives, ban and low conversion rate, the figure of $ 200 looks much more realistic.
A more reliable option is to take one farm with a PZRD, which can receive SMS, hang about 9 primitive autoregs on it and pour it all on Dolphin automatically. At the same time, you can not be afraid of bans and checkpoints. As a result – 1 farm worth $ 10-20 plus $ 99. a month for using Dolphin – a total of 114 to 123 dollars.
To minimize the risk of being banned, you can additionally pay for the use of a proxy (about $ 40). per month or a dollar per port per week for IPV4).
So, to get started on Facebook, there are two ways to go. The first one is the most economical. We use free services to the maximum, we buy only domain and acci. On average, the costs in this case will amount to about $ 9 plus the advertising budget.
The second way is more realistic. We try to fit into the allocated minimum, but taking into account that the bay will take longer, so we pay for the proxy for a month. Expenses – about $ 340. plus the advertising budget. Now it remains only to find a profitable bundle and scale wisely.
If you still have questions and you need consumables, write with pleasure we will tell you

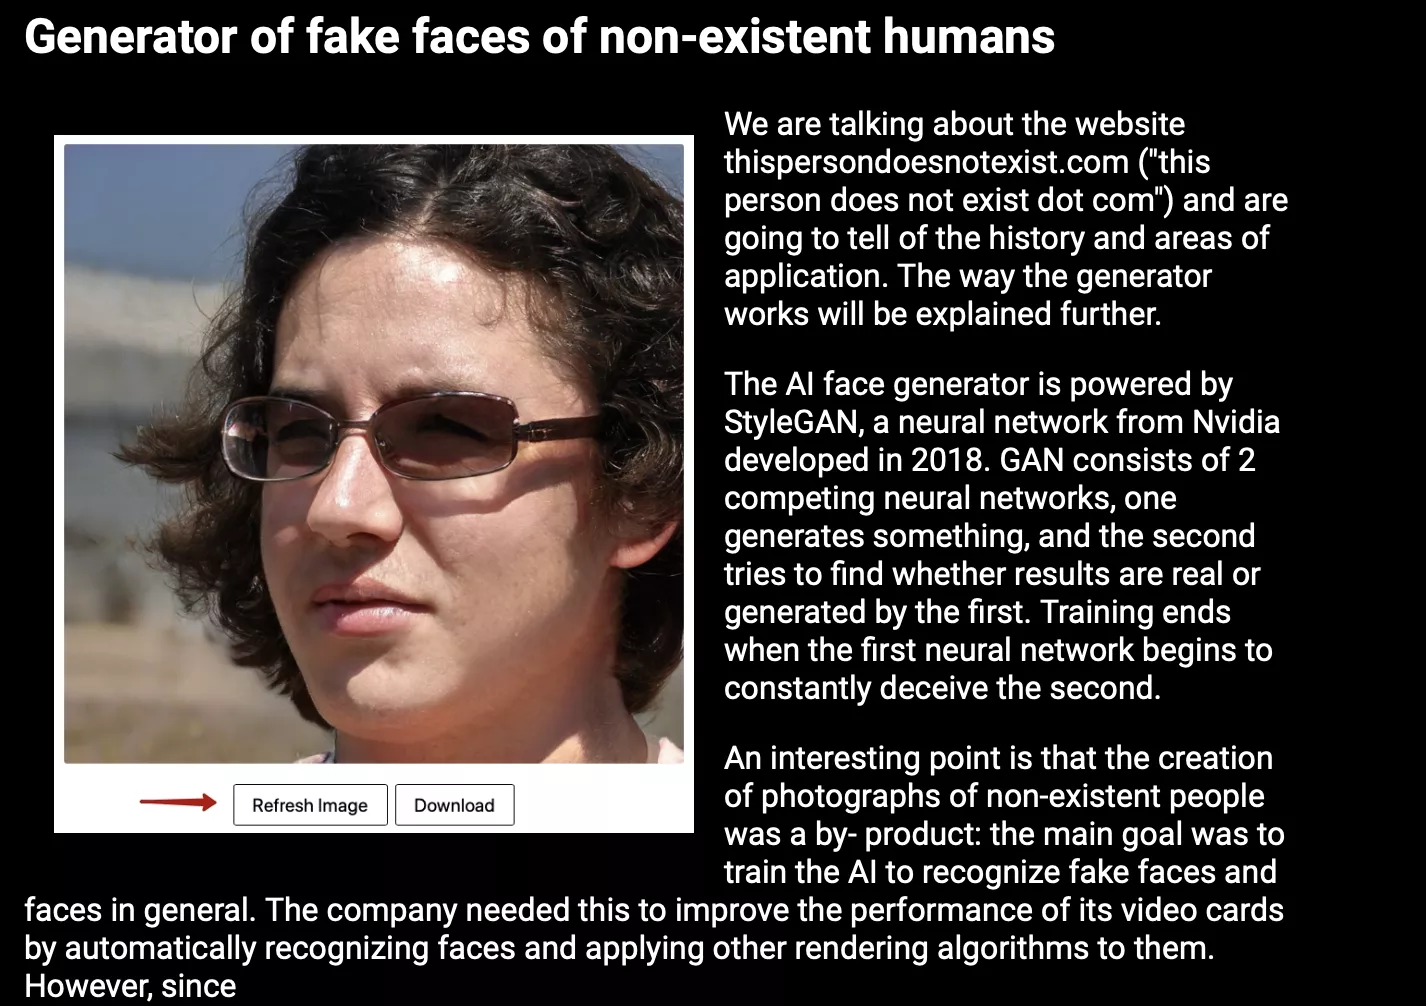
5 generators of faces of non-existent people. Neural networks for generating photos of people. A selection of neural networks for generating realistic photos of non-existent people. An alternative to the ThisPersonDoesnotExist site.
Content
1. Random Face Generator
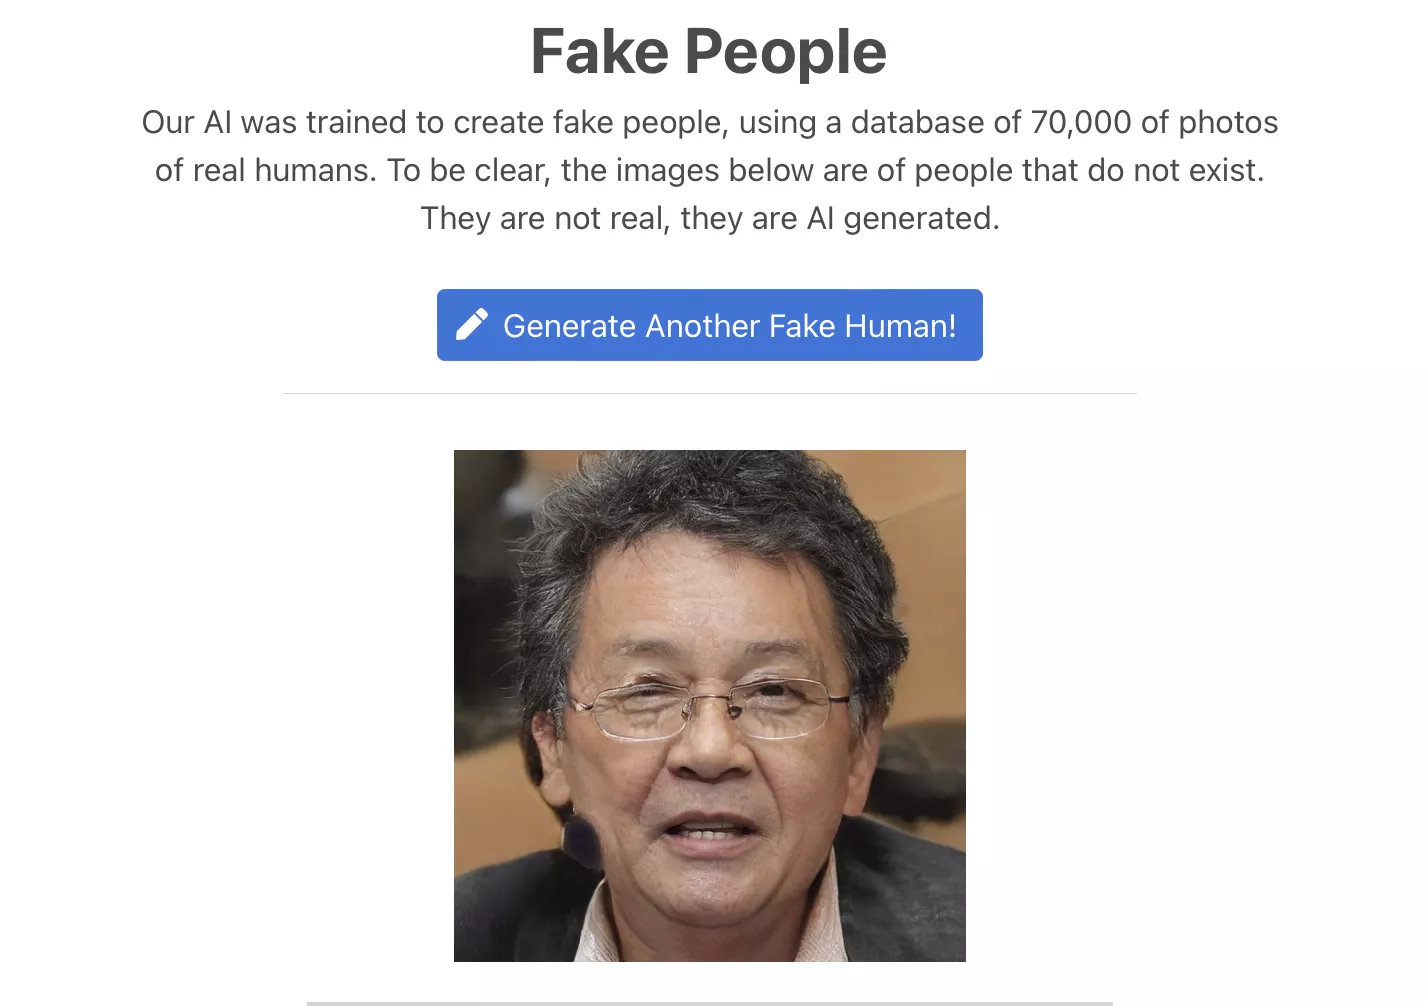
2. Bored Humans
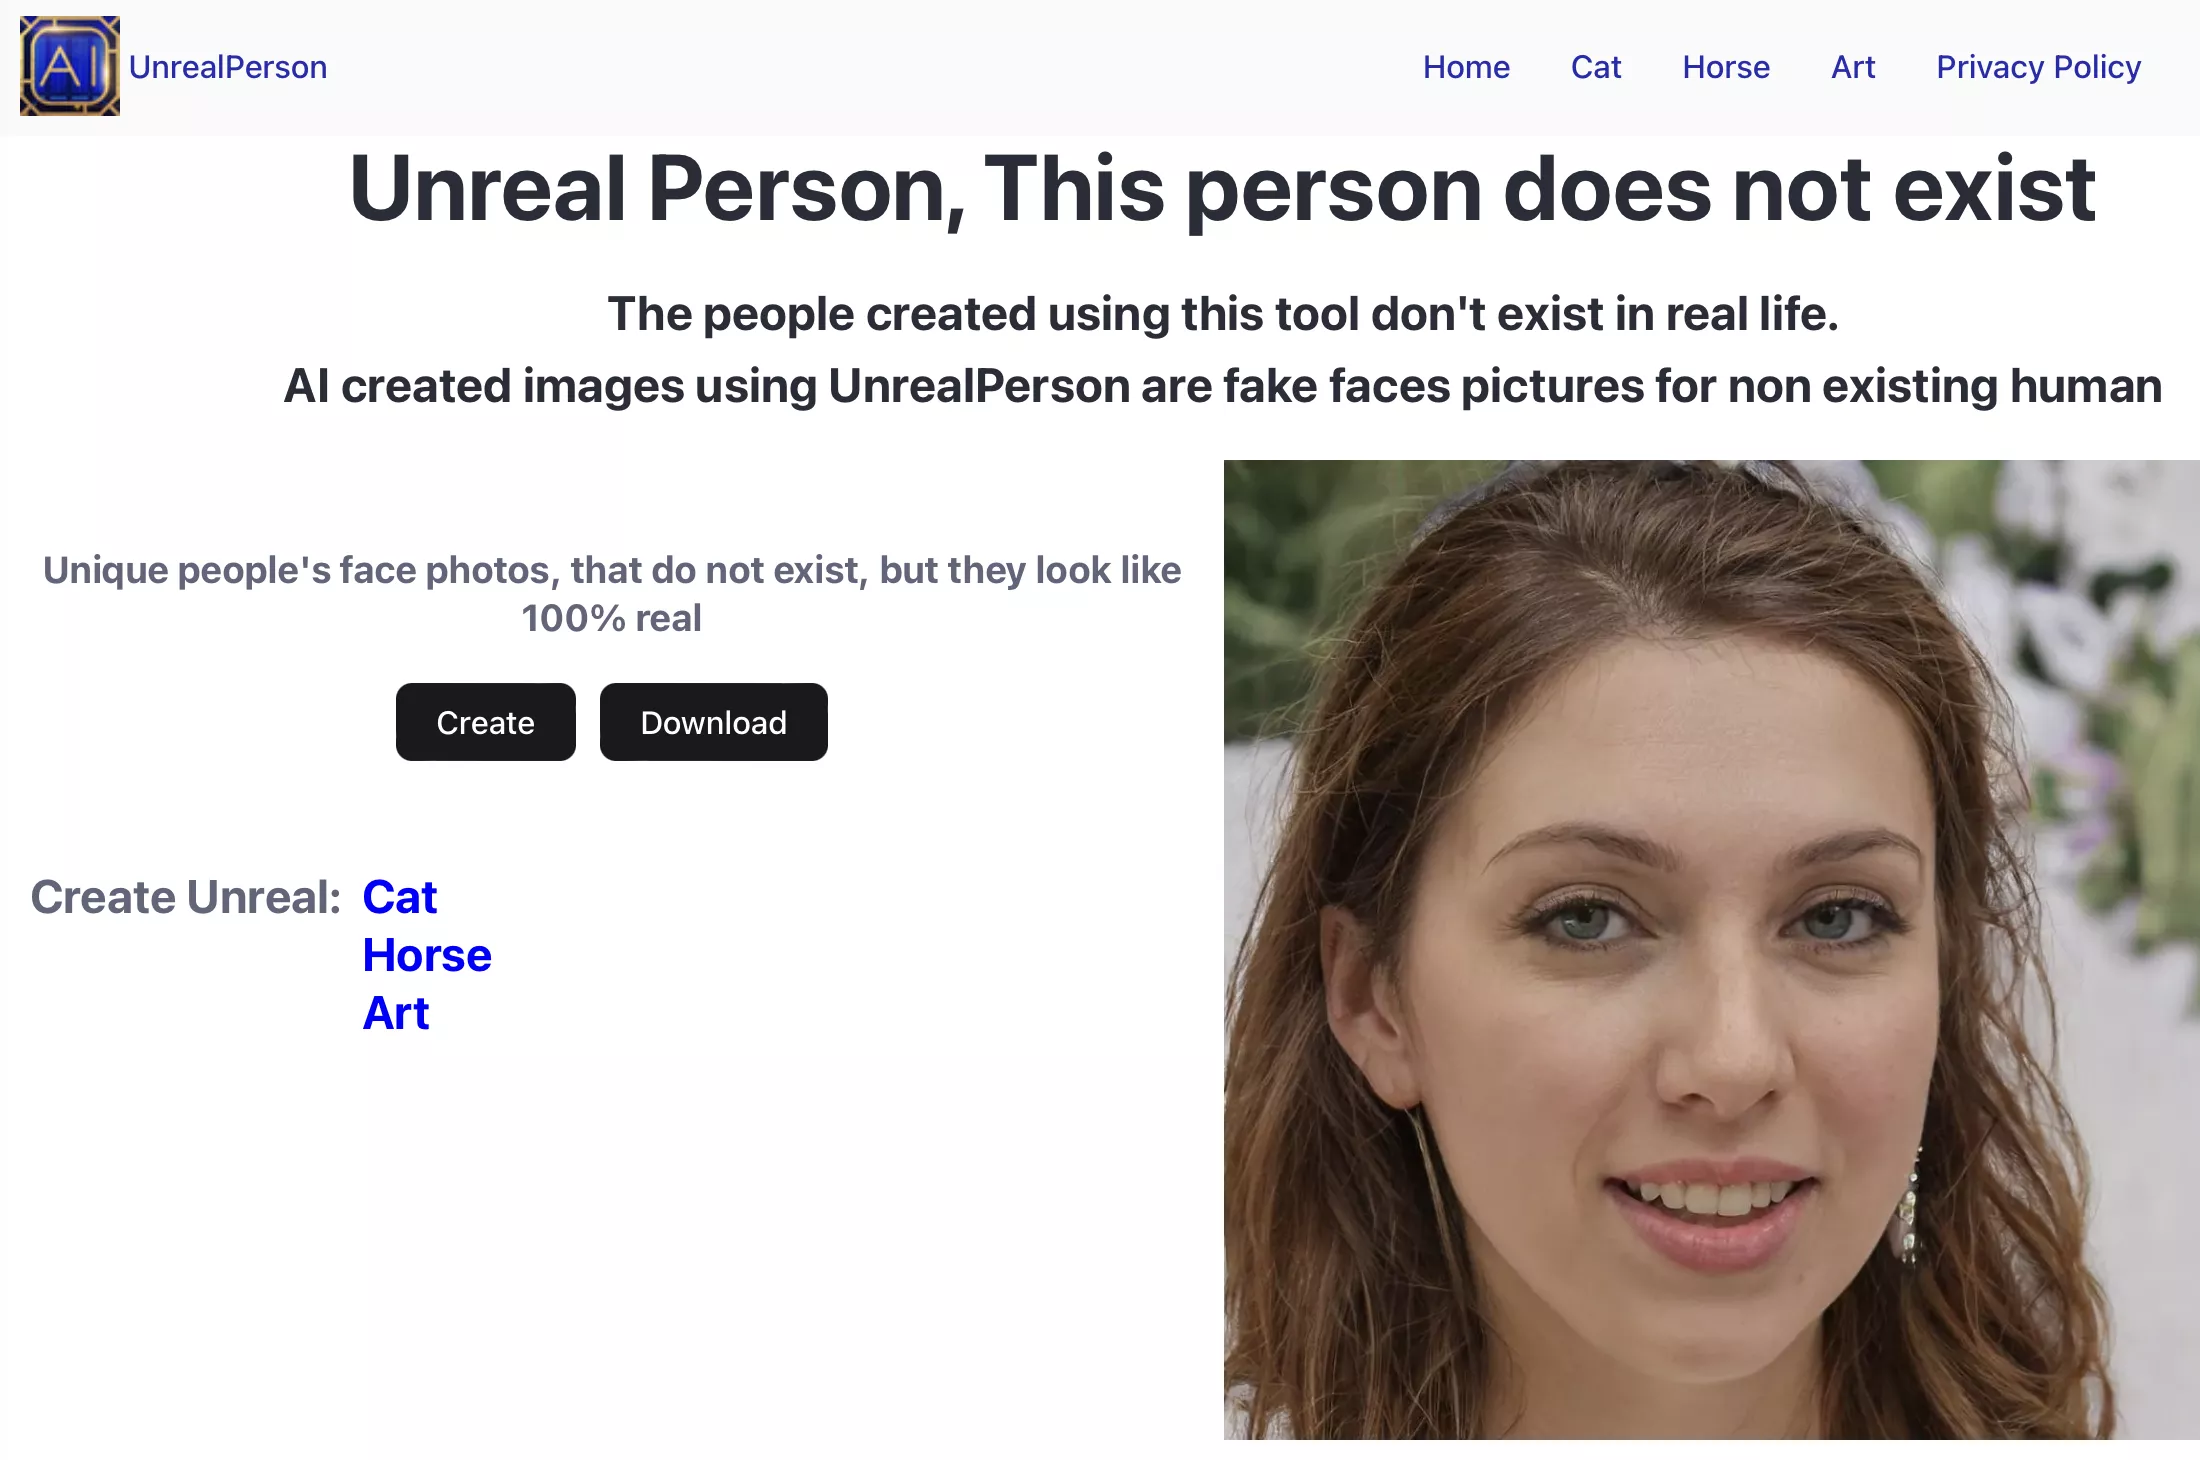
3. Unreal Person
4. Which face is real
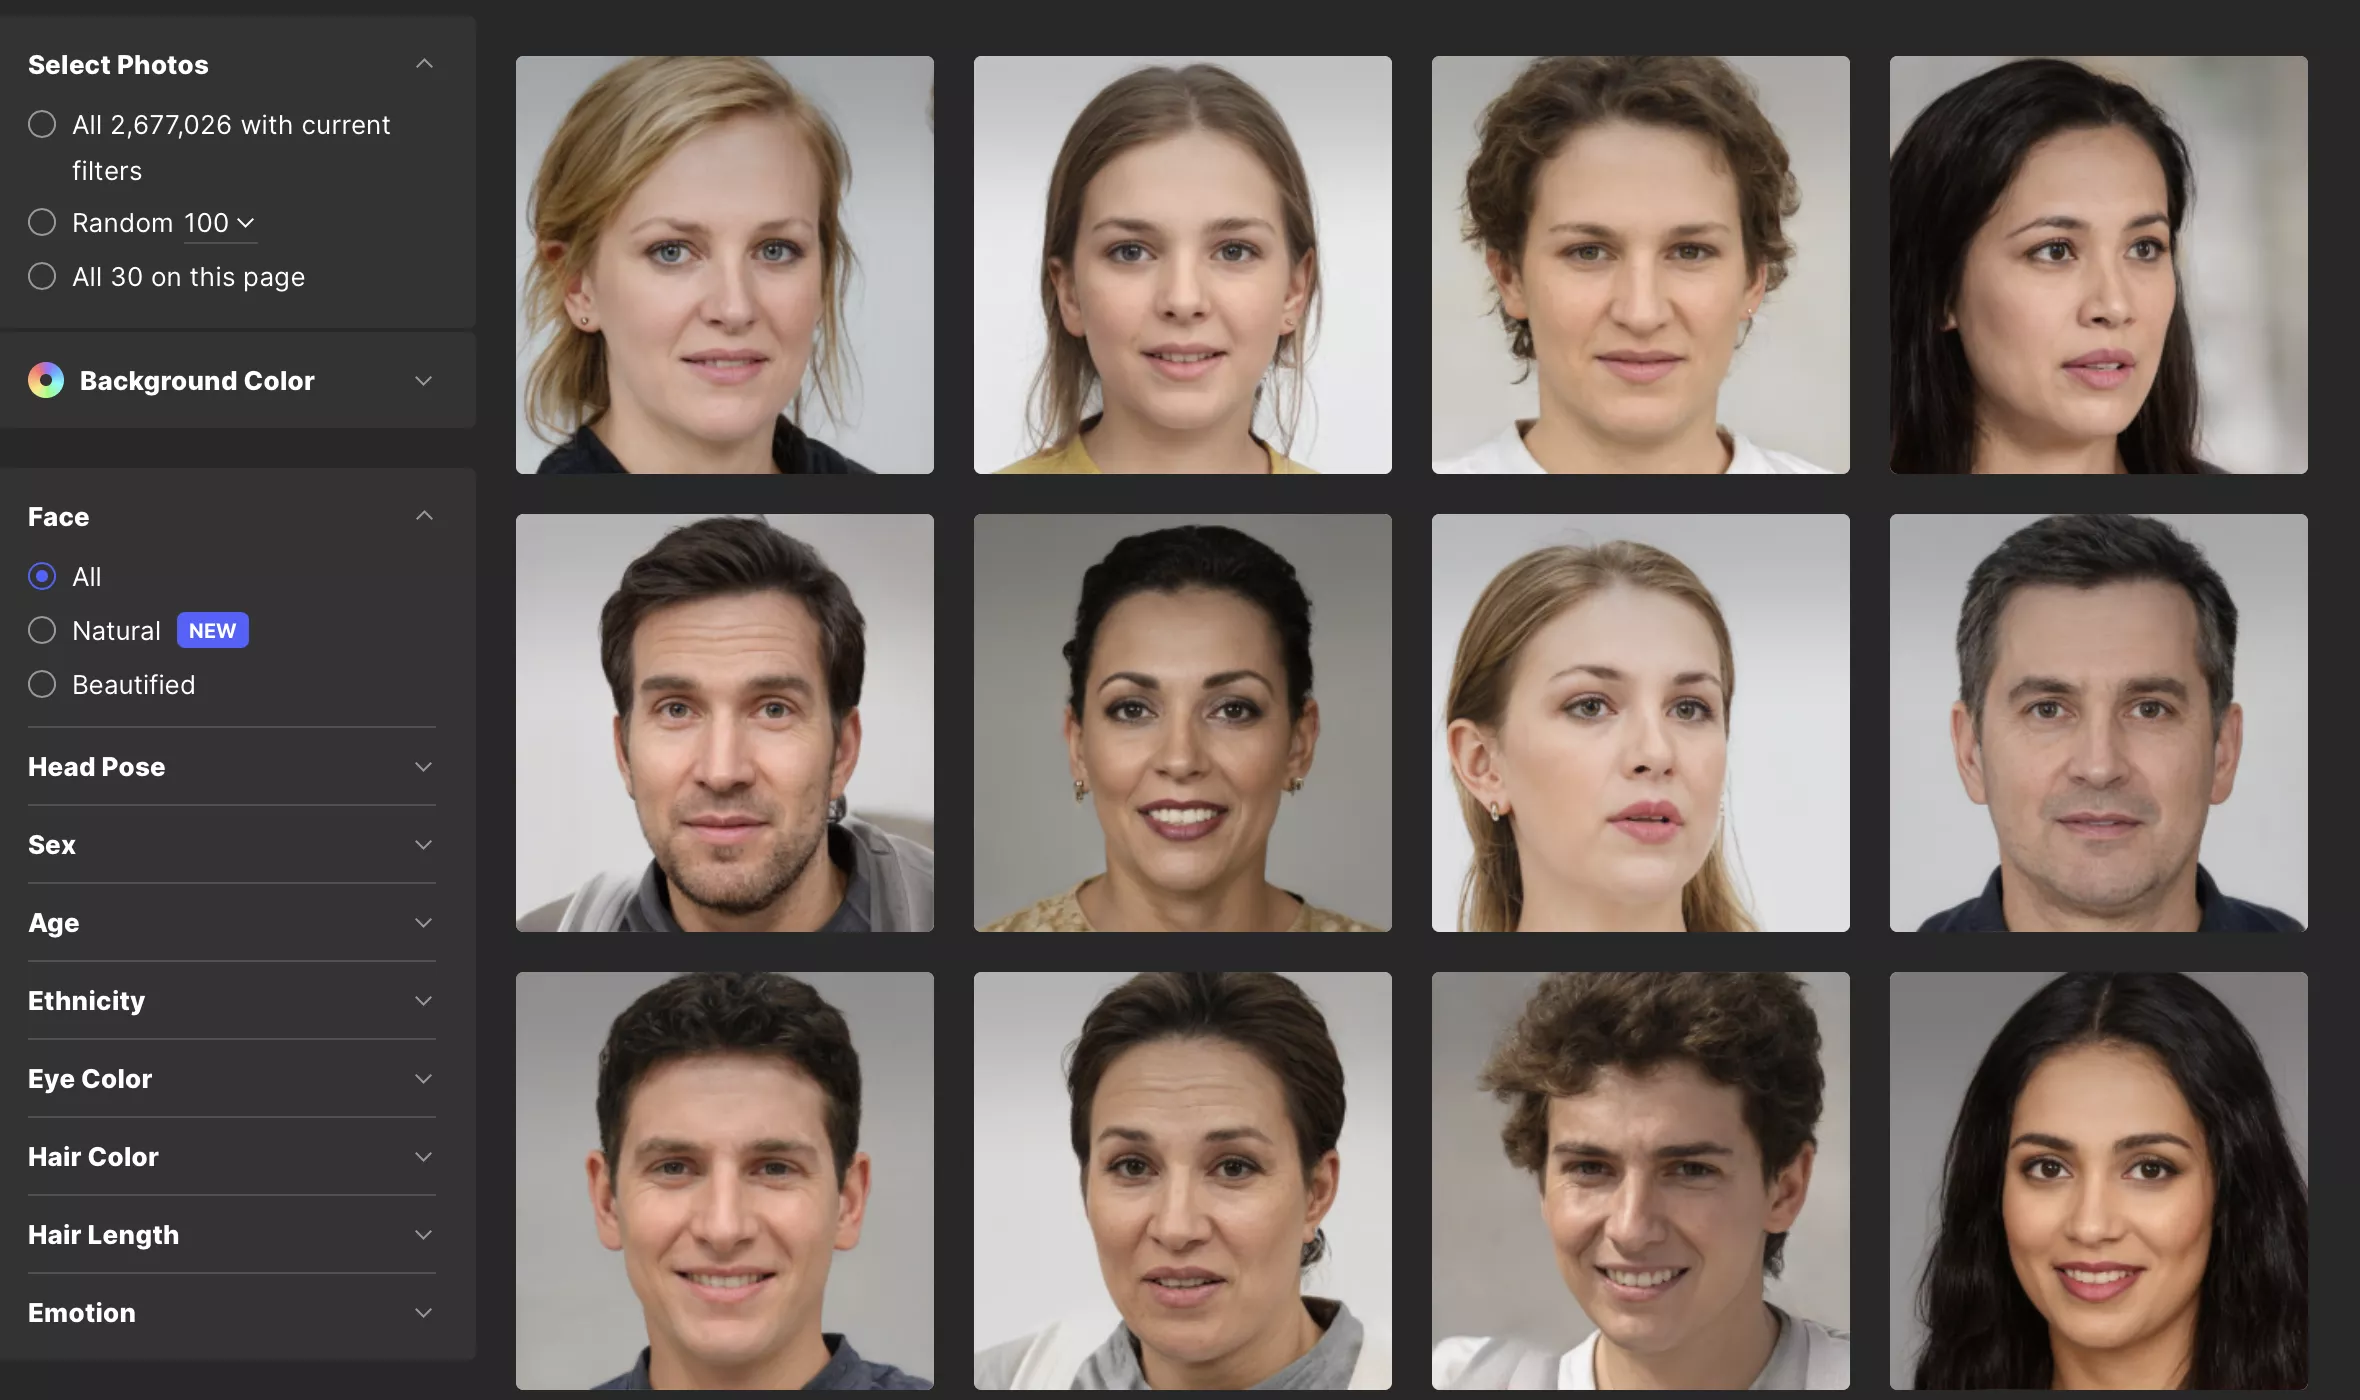
5. Generated photos
Creates a random human face in 1 click. Artificial intelligence generates photos of a man, woman or child.
One-click generation.
The AI face generator is based on StyleGAN.
Free generation is available.
Link: https://this-person-does-not-exist.com
This neural network was trained to create fake people using a database of 70,000 photos of real people.
One-click generation.
There is an old version on StyleGAN-Tensorflow and a new version — StyleGAN Chainer.
There are 50 funny pages of Artificial intelligence (AI).
Free service.
Link: https://boredhumans.com/faces.php
It is an artificial intelligence image generator that has been trained on billions of human faces to create a completely new face that does not exist.
One-click generation
Generation of human faces, animals and art images.
Completely free service
Link: https://www.unrealperson.com
All images are either computer generated using StyleGAN software, or are real photos from the FFHQ Creative Commons dataset and publicly available images.
The site offers to guess which photo is real. When you click one of them, the correct option will be highlighted with a green frame. So the second one is a generated neural network.
One-click generation
The page displays 2 photos – one real, the second generated.
Link: https://www.whichfaceisreal.com/index.php
The service generates faces according to the specified parameters.
Generation of faces, portraits, emotions, objects, surfaces
There is a choice of background
There is a choice of face generation, head pose, gender, age and so on.
Free rate and paid rate — $19.99
Link: https://generated.photos/faces/

The Tiktok social network continues to gain popularity around the world, maintaining its attractiveness as an advertising platform not only among marketers, but also ordinary arbitrageurs. We offer you to get acquainted with the vertical trends in TikTok for this year.
Curiously, with the advent of Tiktak, users began to watch less TV, as evidenced by a recent study that the company collected on its users in the United States, Canada and Europe. 35% of the surveyed users admitted that they began to watch less TV or completely abandoned it, replacing it with tiktoks. Another 45% of users admitted that they began to spend less time on dating apps, preferring TT
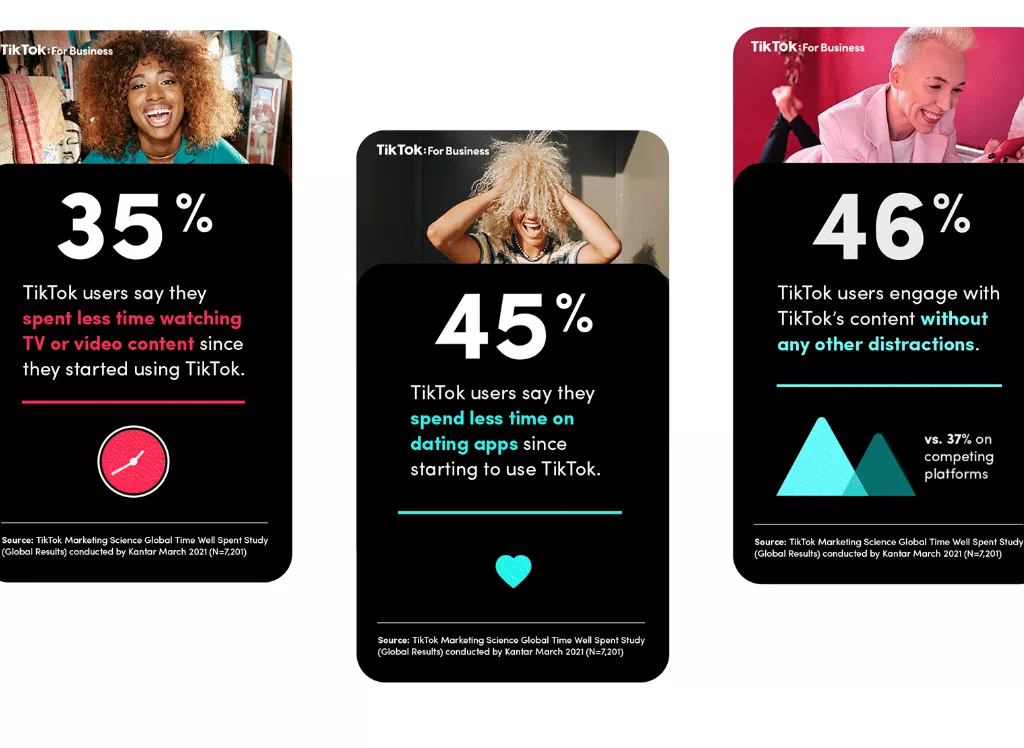
46% of the surveyed users admitted that watching videos in TT absorbs attention so much that it is difficult for them to be distracted by external factors. And this level of engagement attracts more and more advertisers to the platform.
Catch a cheat sheet with trends and keywords in TikTok, which will help to better prepare an advertising campaign, as well as a selection of 5 verticals that can be launched in TT today.
One of the main features of TikTok is a young audience. Most of the platform’s users are between the ages of 16 and 24, and this should be taken into account when choosing products for advertising. In addition, TT is still dominated by women, more than 60% of users on the platform are representatives of the fair sex.
TikTok is a great platform for advertising, but for a successful campaign it is necessary to take into account many features of the platform. Pay attention to trending industries, choose your target audience, and use interactive formats.
#TikTokAdvertising, #TikTokTrends, #BeautyProducts, #SportsAndFitness, #ClothesAndShoes, #EntertainmentAndGames, #TravelVertical, #YoungAudience, #InteractiveFormats, #TargetAudience, #TikTokTrends, #TikTokMarketing, #TikTokInfluencers, #TikTokAdvertising, #TikTokFollowers, #TikTokAnalytics, #TikTokHashtag, #TikTokVideos, #TikTokMonetization, #TikTokContentStrategy

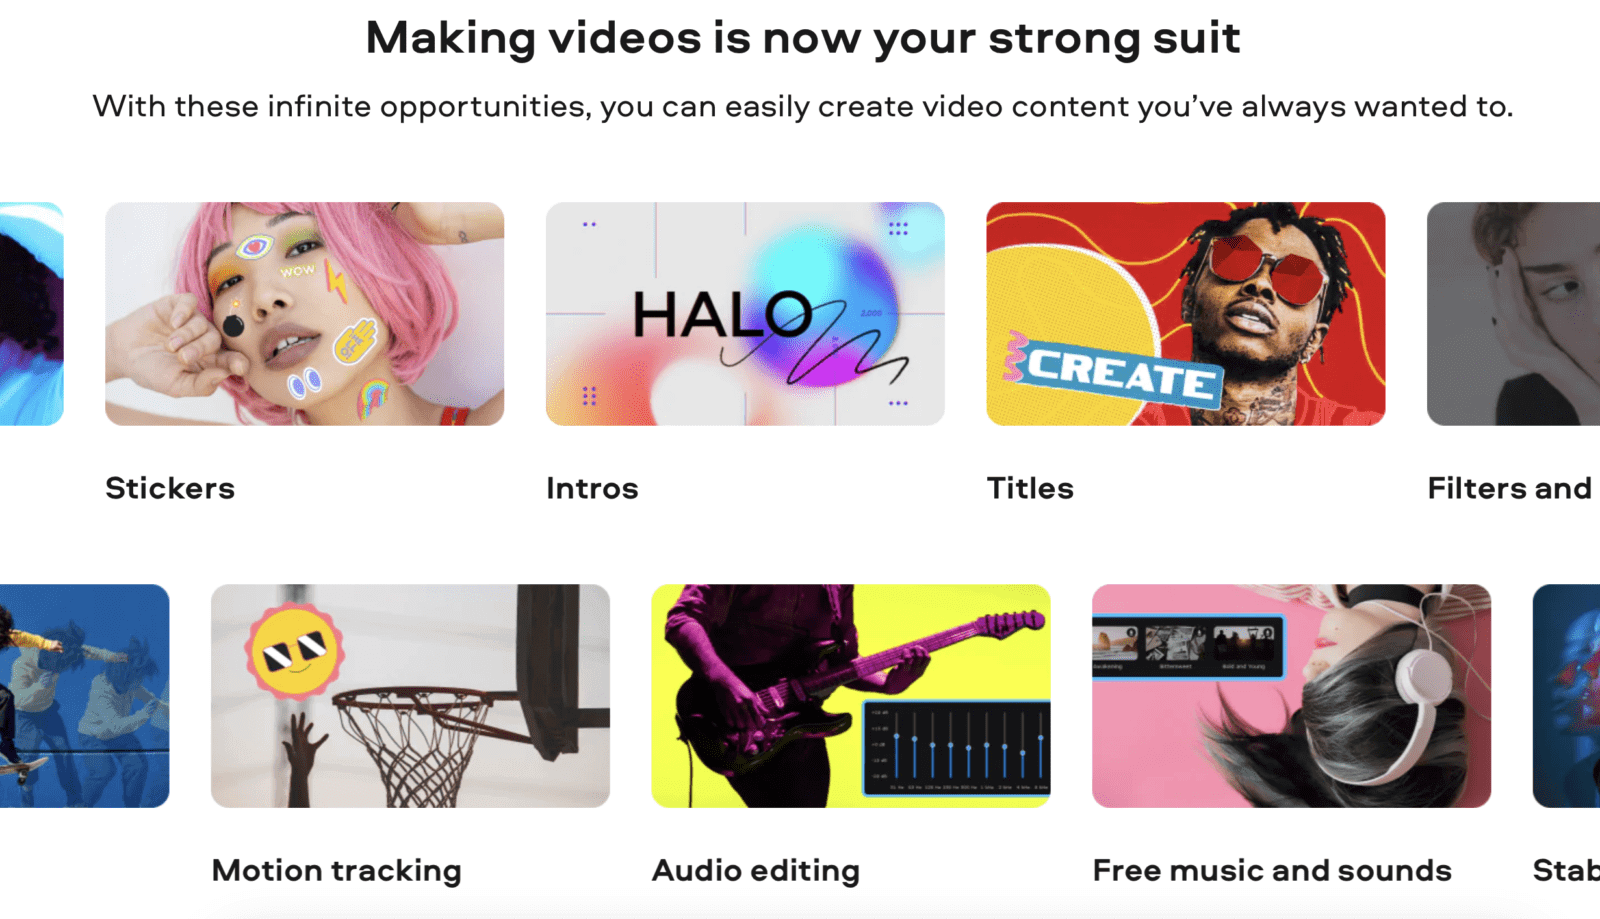
9 best photo editors using neural networks In marketing, unique images and photos are always needed. They are needed for both articles and regular ads. It is extremely important that the marketer be able to use new, high-quality pictures and photos without being challenged by other people. This is what this material will talk about.
We’ve put together for you a selection of neural networks that make finding and preparing images for any purpose much easier. These are free tools that also contain additional functionality with a paid subscription.
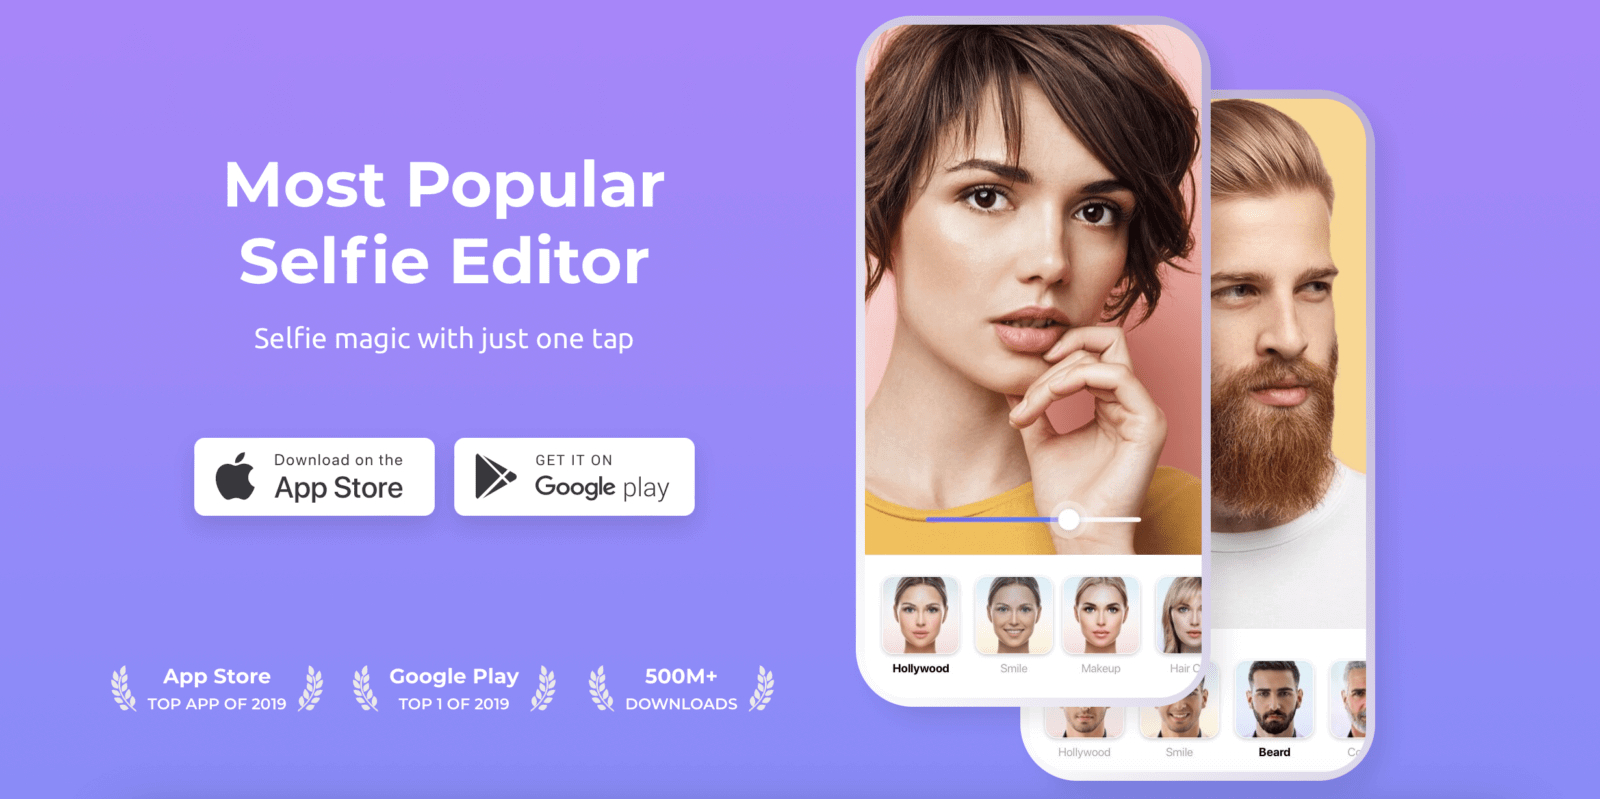
This is a photo processing app from Wireless Lab. Recently, the app has become very popular due to the ability to change the face in a photo to see what a person will look like in old age.
The neural network can now do the following:
Make the person in the photo look old or young
To add a realistic smile
apply makeup
change the hair style
add a beard, glasses, accessories
Apply other filters available
The editor is very handy, it allows you to save images on your device or publish them immediately to social networks. The results are believable and great for any marketing purpose.
The app is free to use, but imposes its FaceApp watermark. Additional features are available by subscription
Movavi is a PC application that can work like a regular photo editor, but with advanced functionality and the use of neural networks. In particular, the program is used to restore old photos.
Among the functionalities is the ability to remove scratches and to automatically redraw damaged elements. The photo below shows an example of using the program. In addition, there are other functions:
removal of unnecessary objects in the image
applying filters, changing brightness, contrast
apply various filters
change the color of eyes and hair, remove various skin defects
Very often the program is used for posting to Instagram and Facebook.
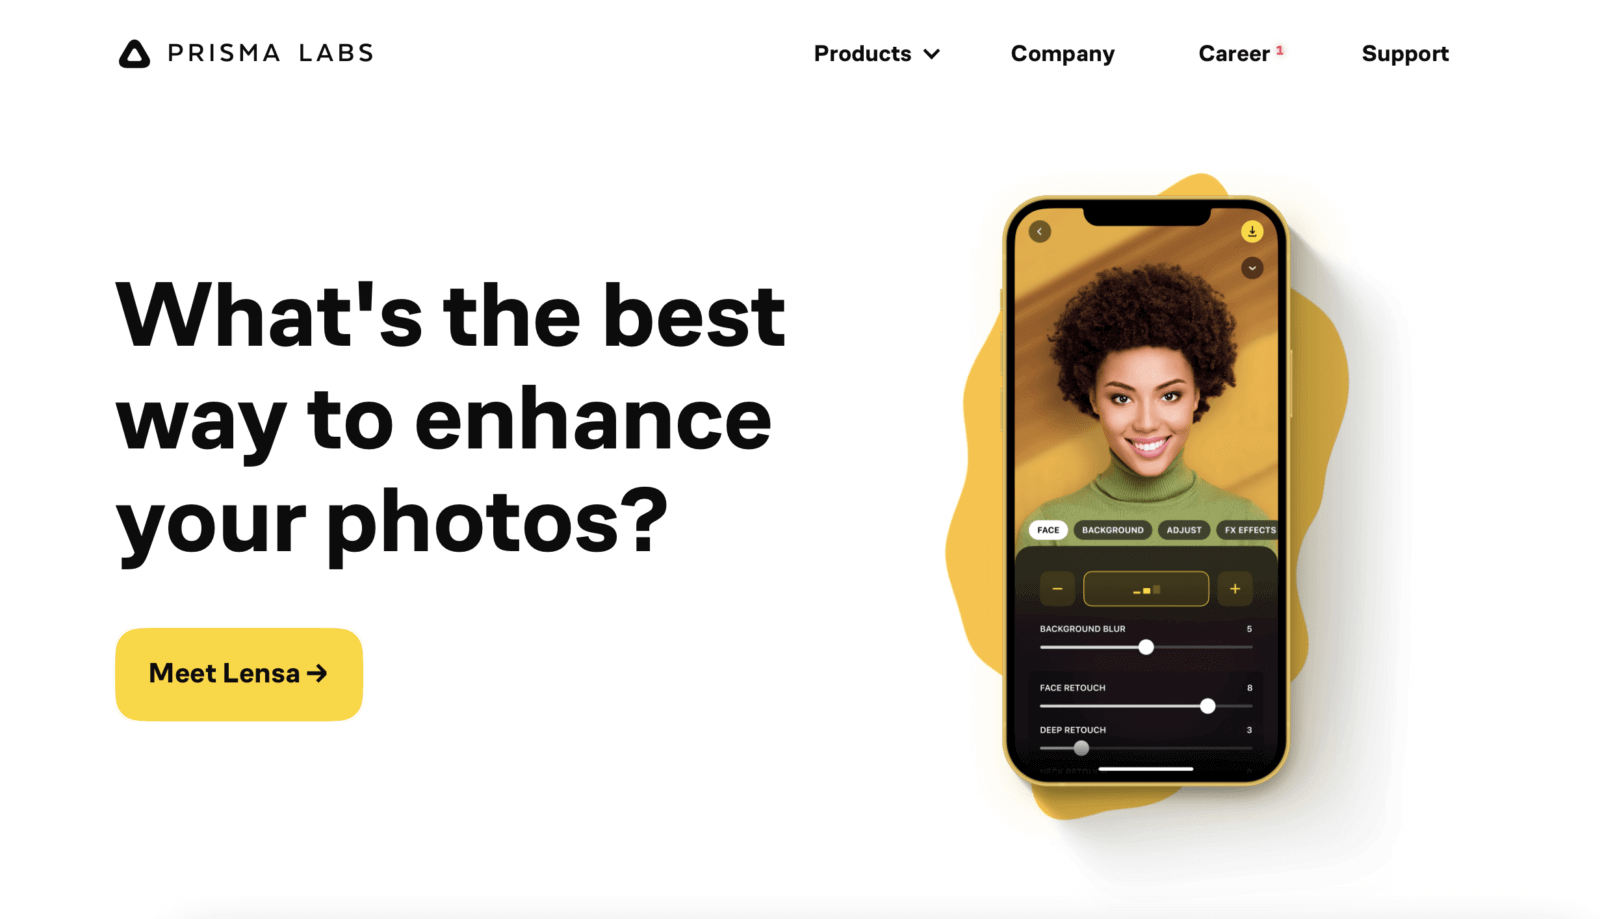
An application for Android devices that uses neural networks. The head of Prisma Labs is an ex-employee of Mail.ru Group.
With the help of the application, different styles can be applied to a photo to change the overall appearance of the image. The resulting images can be used for further processing or to publish directly to social networks. The photo below is an example of one of the Prisma styles.
You can use the app for free, including a list of certain filters, but the most attractive ones are only available with a subscription

This app is only available for Apple devices. With it, you can create realistic 3D busts based on just one photo. The application is developed by the company itSeez3D.
Currently, the program can perform the following functions:
Create and animate 3D avatars with simple actions
place a ready-made bust on the surface of objects using AR-technology
Create stickers for messengers
You can create a 3D model based on a simple photo or camera shot. However, it is recommended to take a photo with good lighting to improve the quality of the result. FaceHero
Colorize
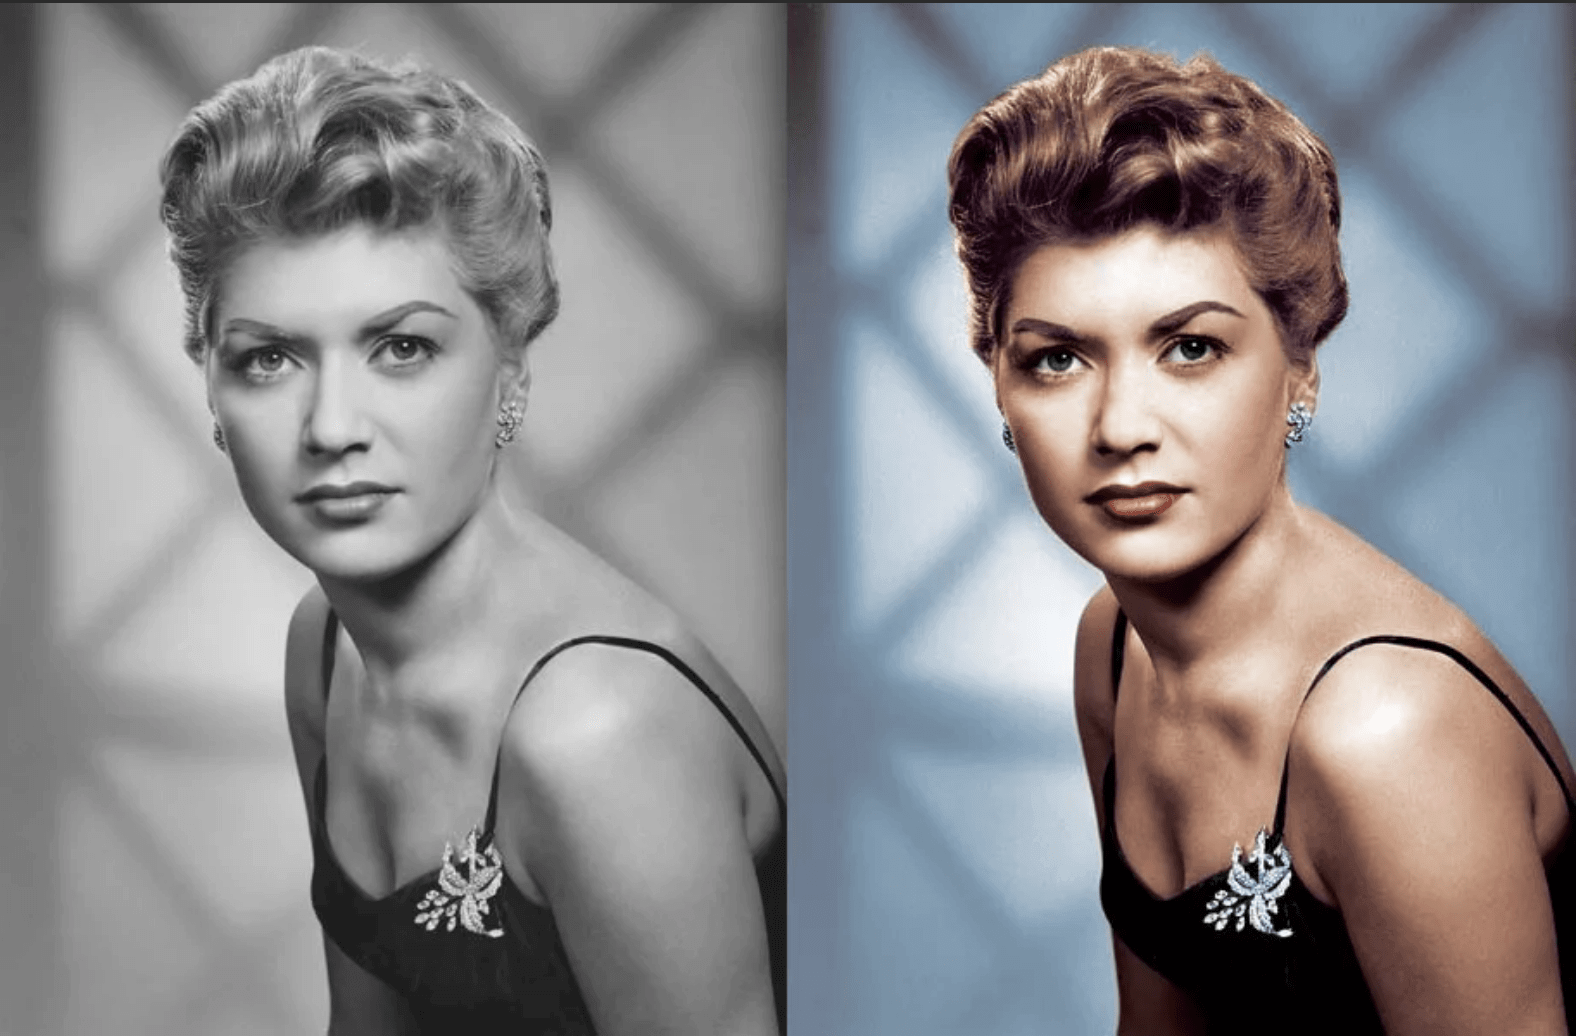
Colorize program is developed by Russian specialists from G-Core Labs and has open source code. With the help of a built-in neural network, the application can color black and white photos with realistic colors.
You just need to send the necessary photo and specify the Email address to which you will receive the final result. Usually it takes 10-20 seconds to process a single photo, but for large or complex photos it can take up to 30 minutes.
The service is free, but leaves a rather bright watermark, which you can remove for $10. Free users can upload no more than 50 pictures. With the paid rate, the limit rises to 10,000 images.
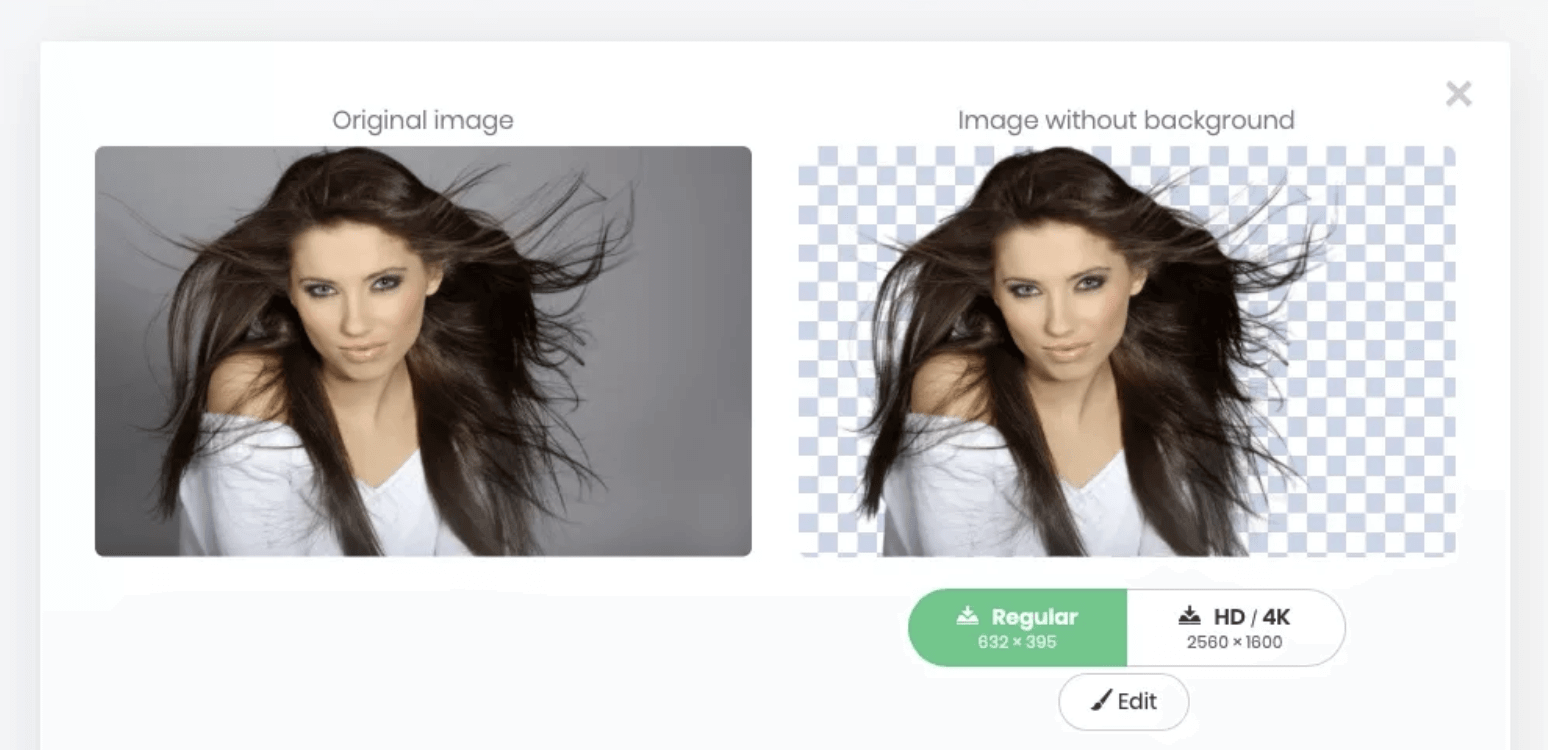
This service was developed with one goal – to remove the background of the photo and leave only the necessary object. Now the application’s neural network handles this task in just 5-10 seconds. The developers do not disclose their algorithms, but indicate that they use neural networks and their own algorithms for processing.
The service now works not only with people, but with other objects as well. In fact, it can be used to highlight any objects in a photo. If necessary, the finished image can be edited, pick up a background for the object and so on.
The service is perfect for any purpose that requires PNG images of objects. In the pictures below you can see the results of the application.

This is a popular neural network based on TensorFlow. It can be used to create completely unique logos based on a few parameters specified by the user. Actually it is a simple logo generator that uses a neural network to generate the result.
You need to specify a few parameters:
The field of activity of your brand
Characters that describe your company
brand name and slogan
2 sets of colors corresponding to brand style
choose the specific colors in which the logos will be made
A few examples of logos you will like from the list of those available
Based on this information, the neural network will create several examples of new logos that fit your specified requirements.
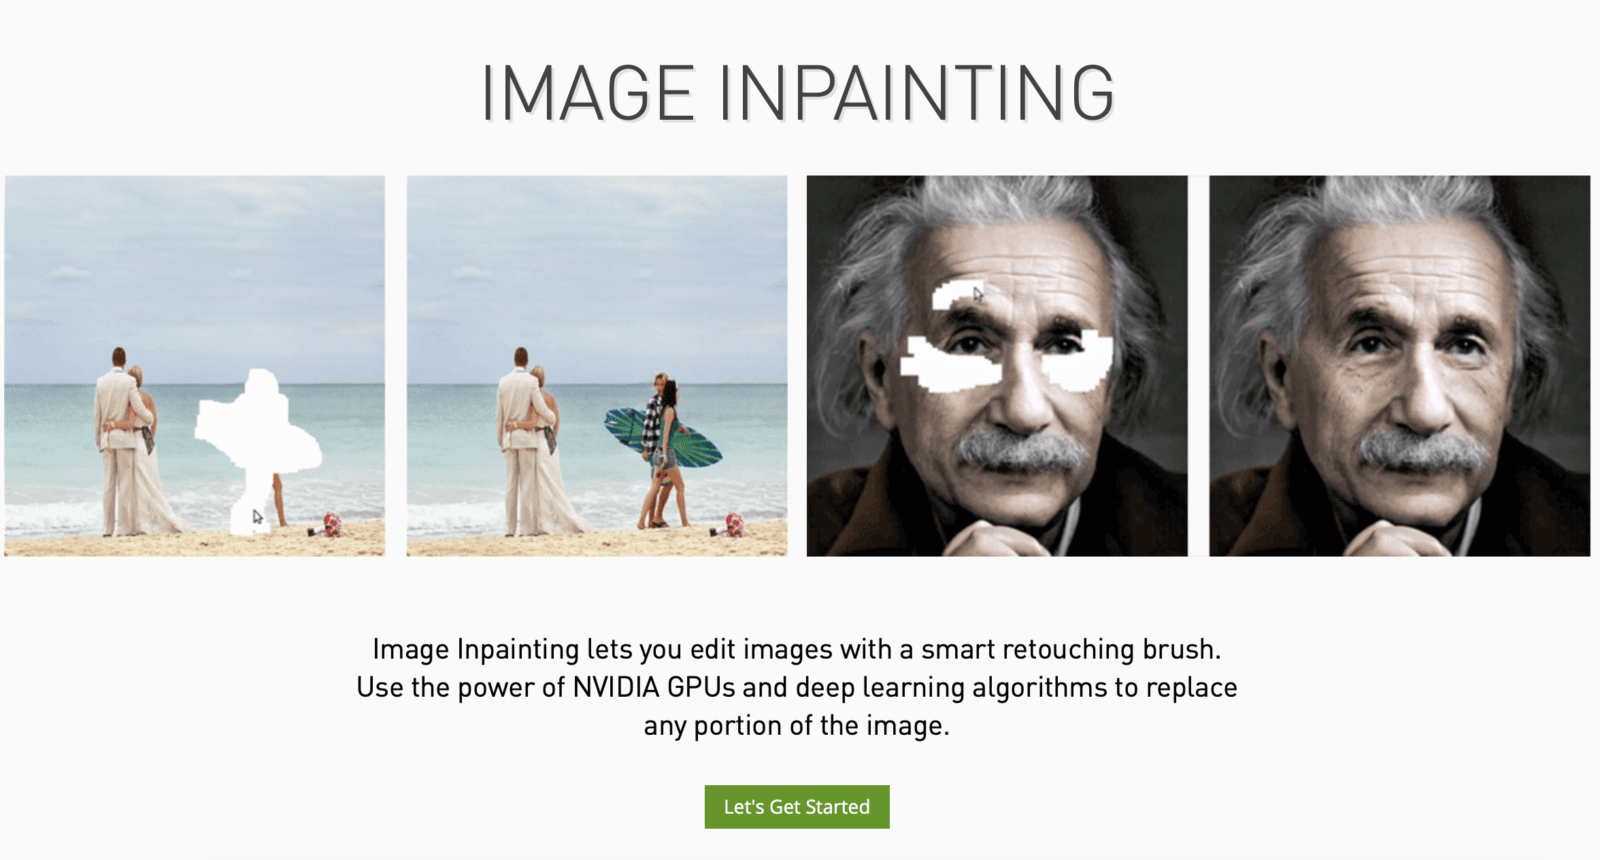
Nvidia has launched its own photo retouching tool. With the service, users can upload and fix their photos using a “smart” brush.
The functionality of the application includes the removal of objects from a photo, which is very useful for pictures that have extra objects on them.
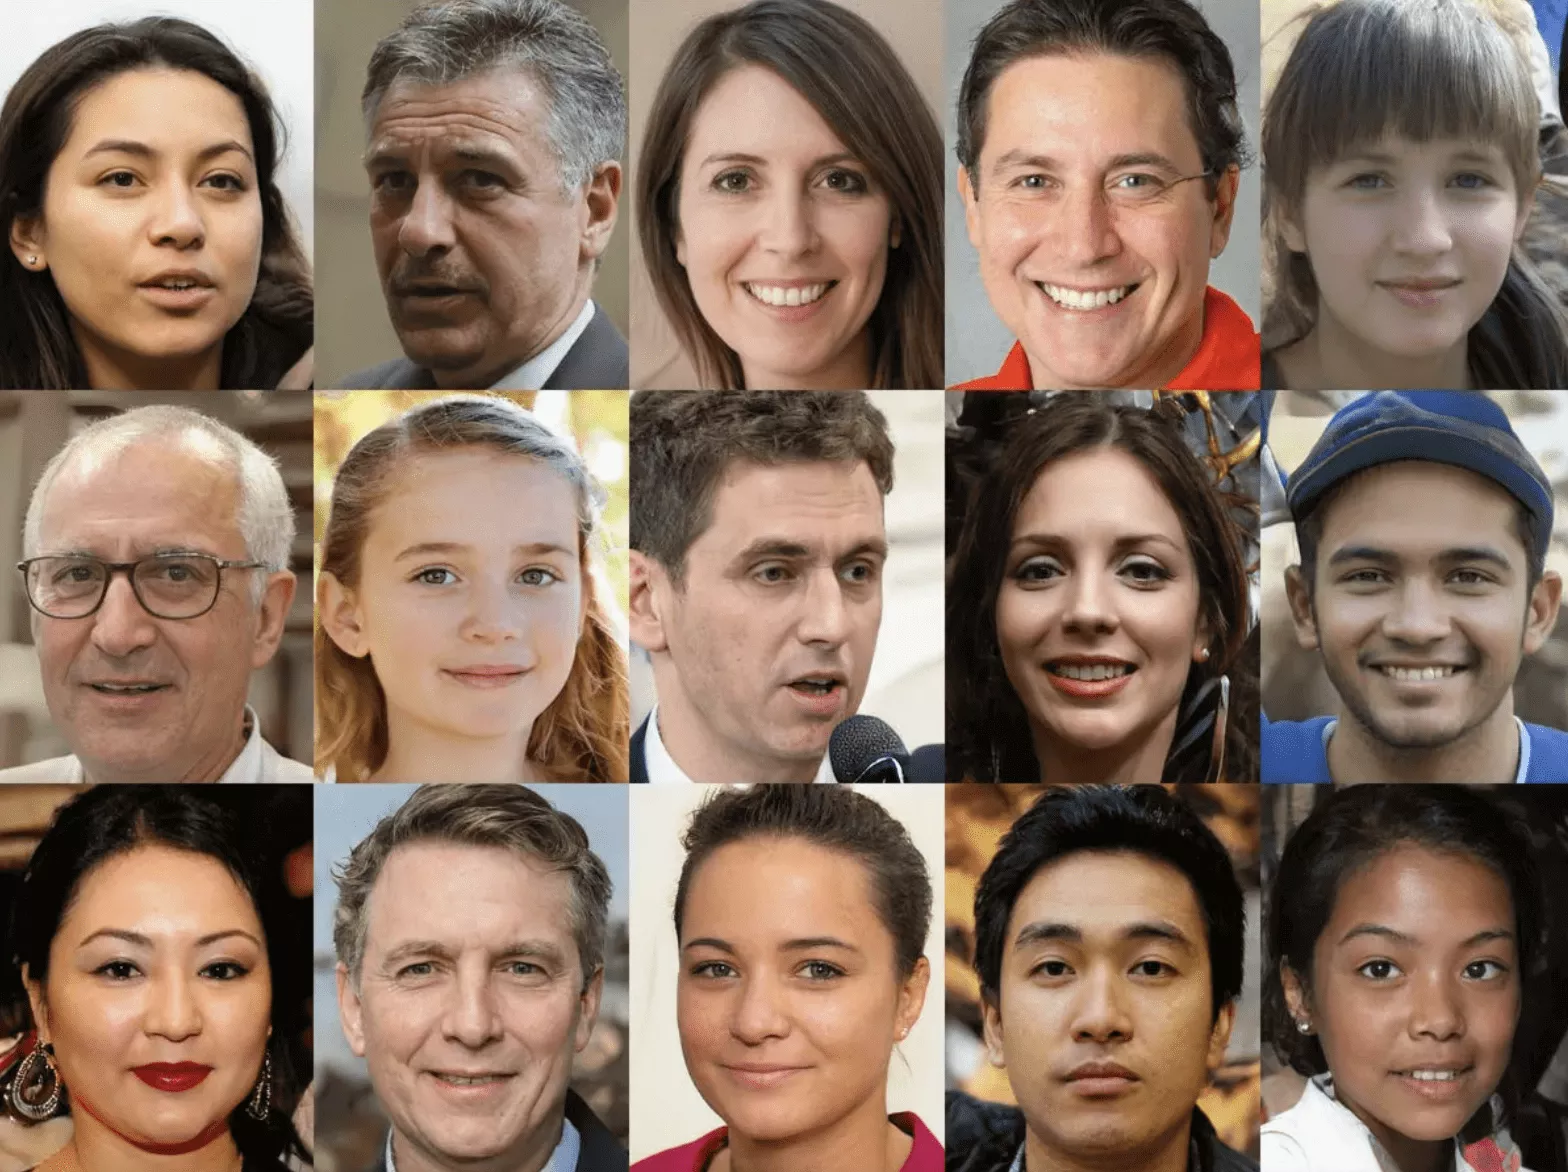
This is one of the most popular services on the web that allows you to generate completely random people’s faces. It uses neural networks from Nvidia and StyleGen.
The neural network uses millions of processed photos to create realistic but totally unique people’s faces from them. When the page is updated, a new fake face appears, which actually belongs to no one. This Person Does Not Exist

The concept of CPA is constantly encountered in traffic arbitrage. It can be found when working with affiliate programs, setting up advertising campaigns, and analyzing the traffic you receive. Each of them uses CPA to define specific tasks. In today’s article, we will take a closer look at this concept, figure out what it is created for and how to work with it properly.

CPA (Cost Per Action) is a marketing metric that shows the total cost of a user to perform a specific action. It is calculated to determine the price per conversion event and helps to understand the profitability of the investment.
Advertising networks give you a choice between CPA, CPC (cost per click) and CPM (cost per 1000 impressions) and other advertising payment models. The reason the CPA model is preferable is because you pay for direct results. However, this option is not always the most profitable.
In traffic arbitrage, webmasters may often come across the CPA model payment method when choosing an offerer. In this case, it implies that the payment will be made only if the referred client performs a certain action. This can be registration on the site, filling out a form, buying a product, and so on.
It is up to the advertiser to determine and set which events he is willing to pay for. Therefore, all the actions covered by this model are different in each case. In turn, the price depends on the complexity of the task.
Different verticals and offers offer different types of CPA model. So, for example, in Gambling and Betting CPA payment is made if the user makes a deposit for a certain amount, the Tovarka pays for the sale of the product, and Dayting CPA is divided into SOI (Single Opt-in), DOI (Double Opt-in), as well as CPS (Cost Per Sale). Each type implies a different target action: SOI, as a rule, means a simple registration, DOI – an additional action to registration (confirmation of mail, filling out the profile, etc.), while working with CPS payment is made if the client signs up for a paid subscription to the service.
Regardless of whether the advertiser works directly or through an affiliate network, the CPA model is very profitable for him. He can independently choose the desired conversion action and set the desired price for it. In addition, he pays only on the fact of achieving a successful event, and because this directly affects the income of the webmaster, the advertiser receives high performance.
Popular advertising networks always ask what goals you are aiming for (more views, site visits, sales, etc.) when setting up campaigns. This happens so that the algorithms optimize ads for maximum effectiveness and benefit to you. However, this has nothing to do with the advertising payment model. In most cases you will work with CPM (Cost Per Mile) and CPC (Cost Per Click).
The CPA model can be presented in many different ways. And in fact, some of them can be found quite often, but still the key factor is the specifics of the chosen advertising channel.
Here are the main types of calculations in CPA:
As we have already found out, when working with popular ad networks, there is a choice between CPA, CPM and CPC. In any of these cases, in order to profit from the offerer, the webmaster needs to be able to properly optimize the advertising campaigns for the tasks at hand. To do this, you have to constantly compare how profitable the chosen ad bundle is.
You can determine how much a particular action will cost you. To calculate CPA campaigns, use the following formula:
CPA = ad spend ÷ number of targeted actions
Example: we have selected an offer which will pay $200 for each sale using CPA model. The cost of launching the advertising campaign was $10 000. It brought us 80 sales. Let’s calculate the CPA bindings: 10 000 ÷ 80 = $ 125. It turns out we were in the plus from each sale of $ 75, and the total profit was 75 * 80 = $ 6,000.
These calculations are made manually is not necessary. You can use the built-in analytics tools within the advertising network or special trackers. You can view a selection of popular trackers here.
CPA becomes a very useful metric when you determine how much a specific customer action on your offer is worth. Depending on its value, you will be able to understand what actions you should perform next – if the rates are good, you can start scaling the bind, and if the rate is low, you will have to optimize it.
Here are some possible ways to improve your CPA score:
That’s it for now. We’ve covered the main points related to the concept of CPA. We hope this article has given you a full understanding of this aspect. If you still have questions, feel free to ask them in the comments section below. Good luck!

Post Views: 61 Creating a gif from a video with no effort! IntroductionWe will need: Instagiffer (software in which we will make a gifka). Video. Ezgif (there we’ll optimize our avatar for lolz size). Start at Install instagiffer – download. Download the video you need via savefrom. Open instagiffer and press “Load Video”. 3.1 A … Read more
In app webview is an in-app site. It is used by arbitrageurs to drain on gambling, day betting, cryptocurrency, commodities and other verticals. Now let’s create a simple WebView application for traffic arbitrage.
Download Android Studio from the official website developer.android.com/studio. Install the program on your computer. Leave all the default settings.
After installing, launch Android Studio. The program asks you to install the Android SDK. At this stage, choose the path in English.
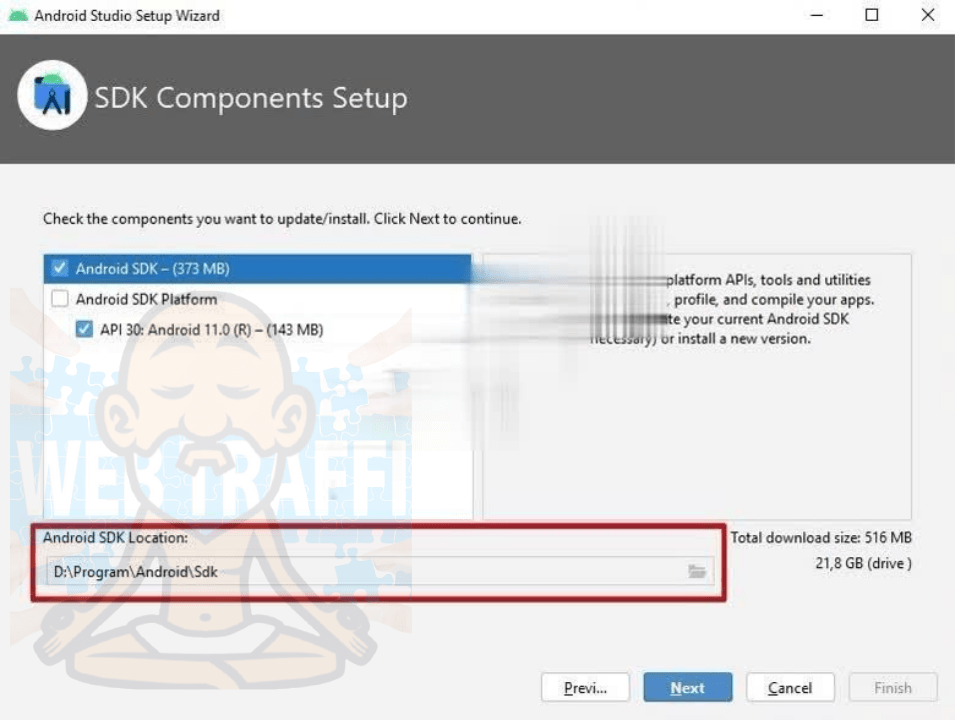
If we choose a path that has letters other than English, the program will show an error.
Select the path, press “Next”. Then press “Finish”. This will start installing the Android SDK on your computer.
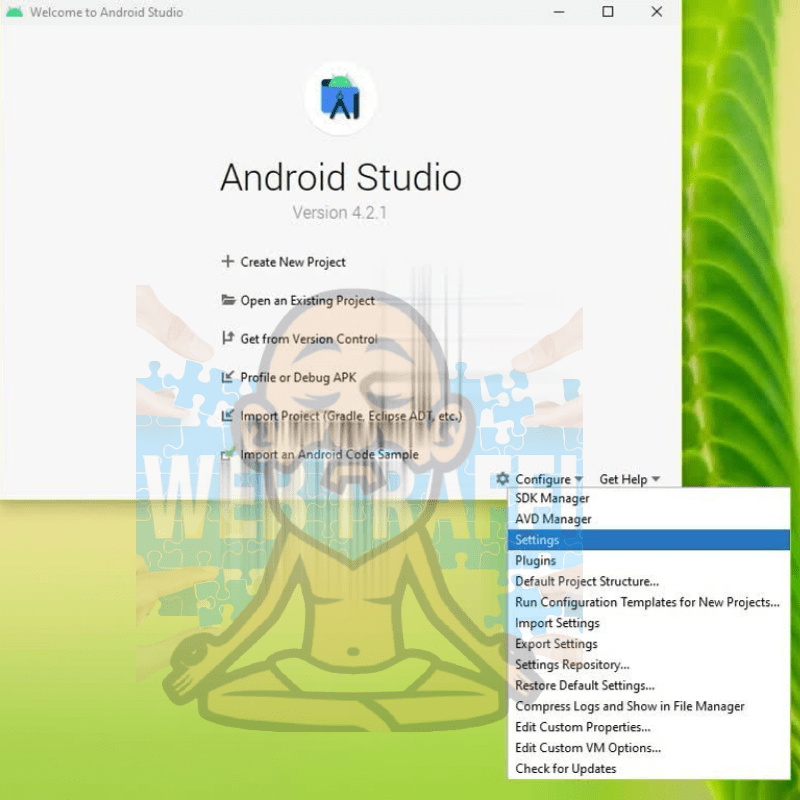
After installing the Android SDK, on the start page of the program click on Configure. Select the SDK Manager.
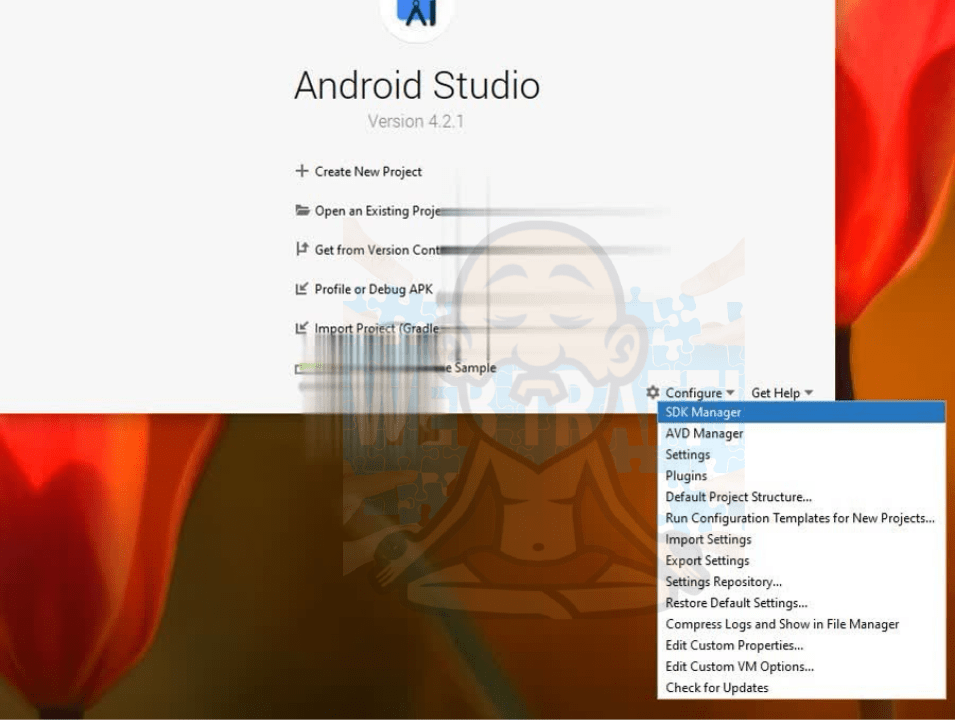
In the menu that opens, go to the Android SDK tab (Appearance & Behavior → System Settings).
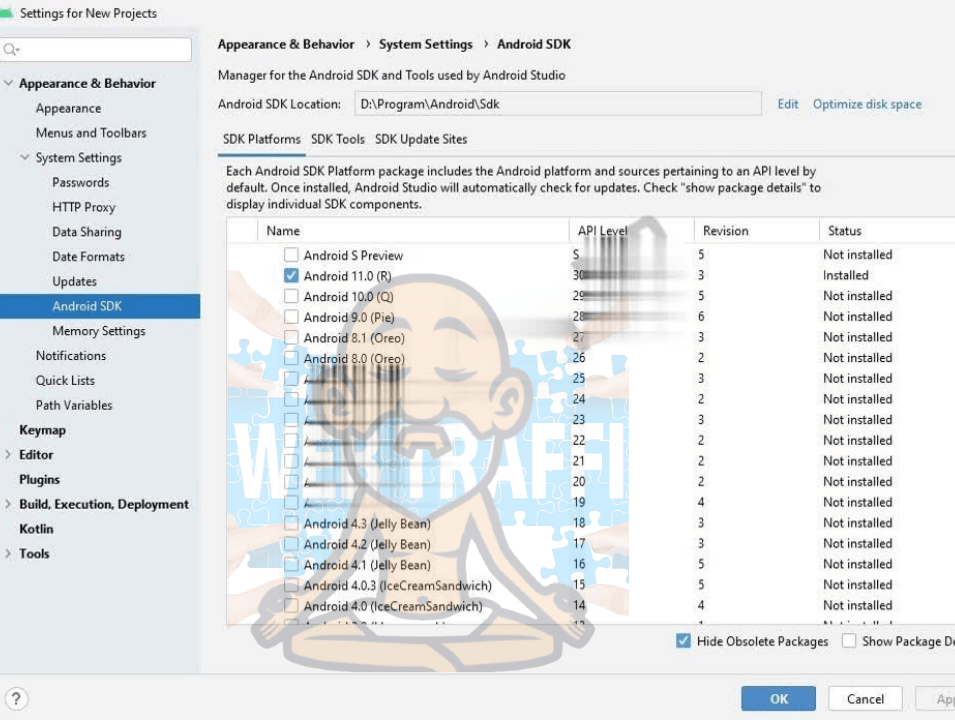
Uncheck Android 11.0 (R). Check Android 10.0 (Q). Go to the tab SDK Tools.
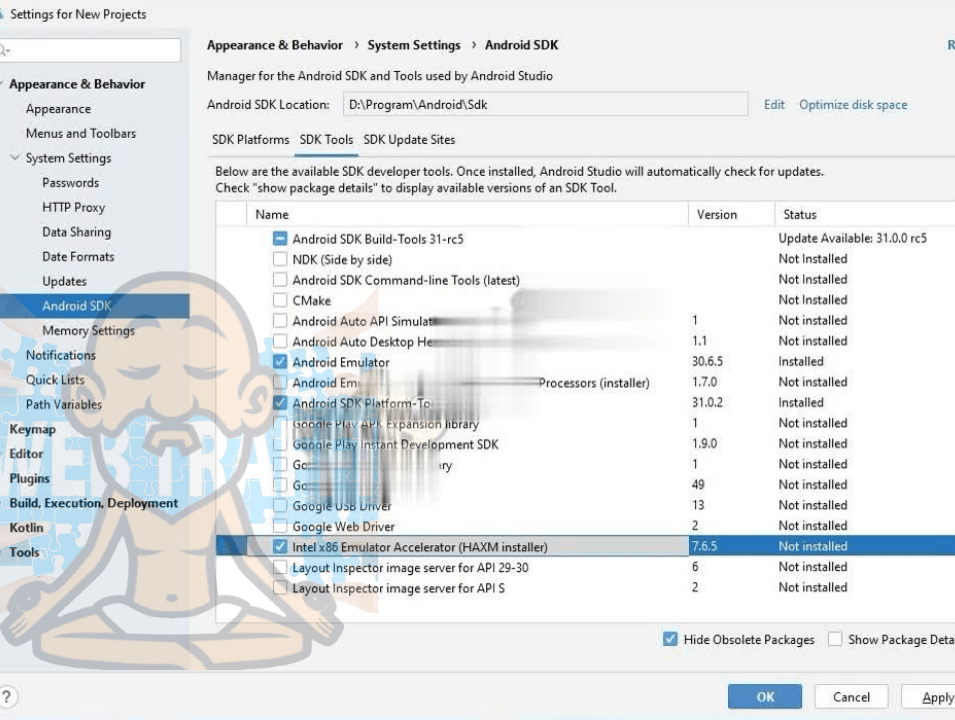
Check the following items: Android Emulator, Android SDK Platform-Tools, Intel x86 Emulator Accelerator (HAXM installer). Click Apply.
Click Ok and accept the user agreement for each package.
During the download, a window may open where you need to allocate the maximum amount of RAM to run the emulators.
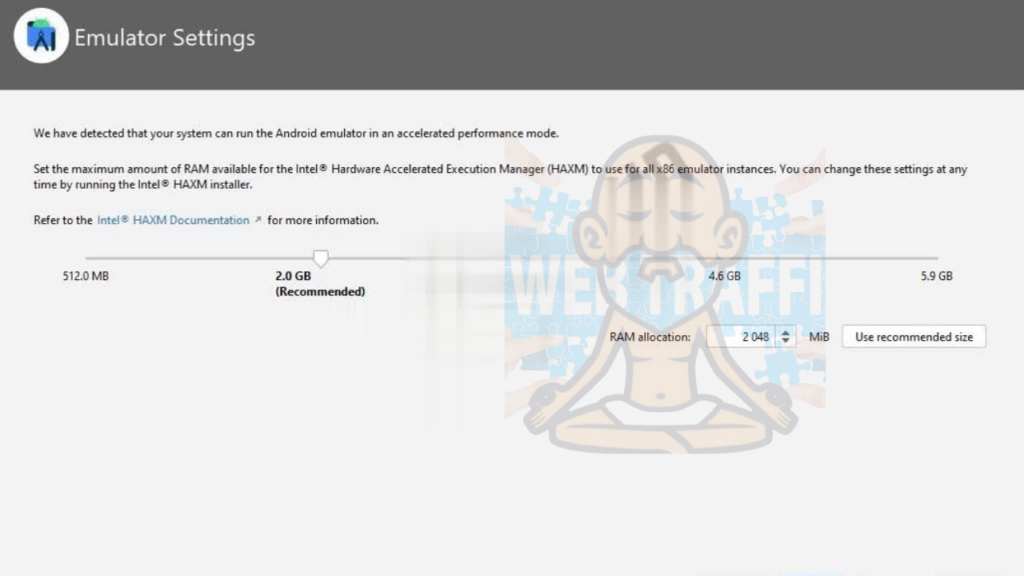
Specify and click Next.
Now let’s write the environment variable on the computer and in Android Studio. To do this, right-click on “My Computer”. Select “Properties”.
Click on “Advanced System Settings” and select “Environment Variables”.
In the “User Environment Variables for User” field, click “Create”.
Specify the name of the variable ANDROID_SDK_ROOT and the value of the variable (example: D:\your folder\AndroidStudioSDK). Press OK.
Let’s create another variable. Specify the variable name ANDROID_SDK_HOME and the path (example: D:\your folder\ AndroidStudioProjects).
Go back to Android Studio. Click on Configure and open Settings.
Go to the tab Path Variables.

Create environment variables by clicking on the plus sign.
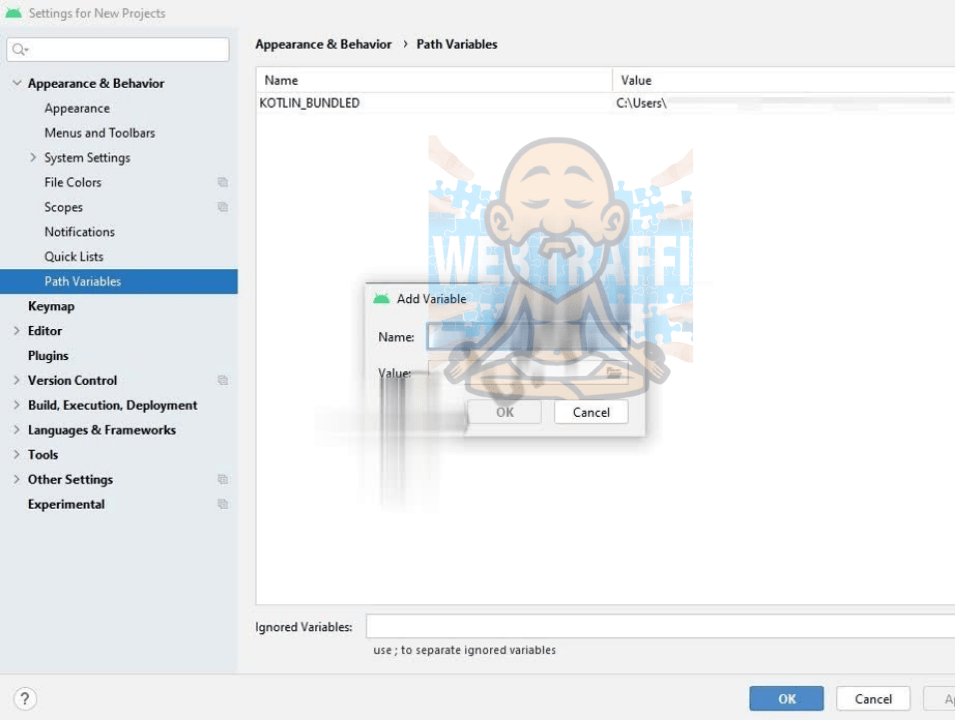
Specify the variable name ANDROID_SDK_ROOT and the variable value (example: D:\your folder\AndroidStudioSDK). Press OK.
Let’s create another variable. Specify the variable name ANDROID_SDK_HOME and the path (example: D:\your folder\ AndroidStudioProjects).
Press Apply and OK.
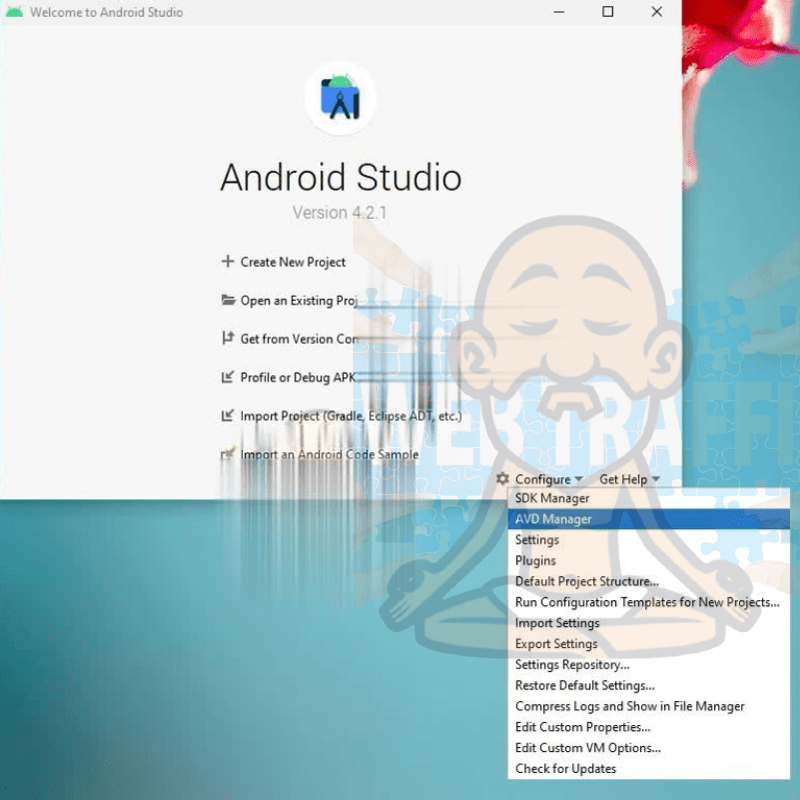
Now let’s create a virtual machine. To do this, click on Configure and open the AVD Manager.
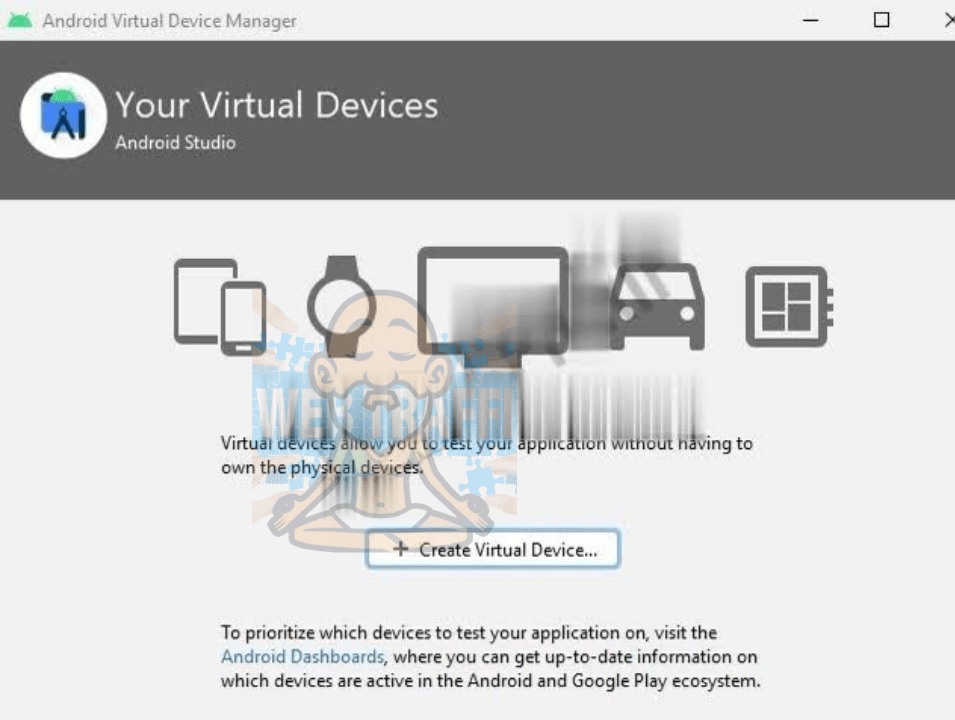
Click Create Virtual Device.
The program is ready to work. Let’s move on to creating the first WebView application.
Open the start page of the program. Let’s create a new project. To do this, click on Create New Project.
Choose the standard template Empty Activity.
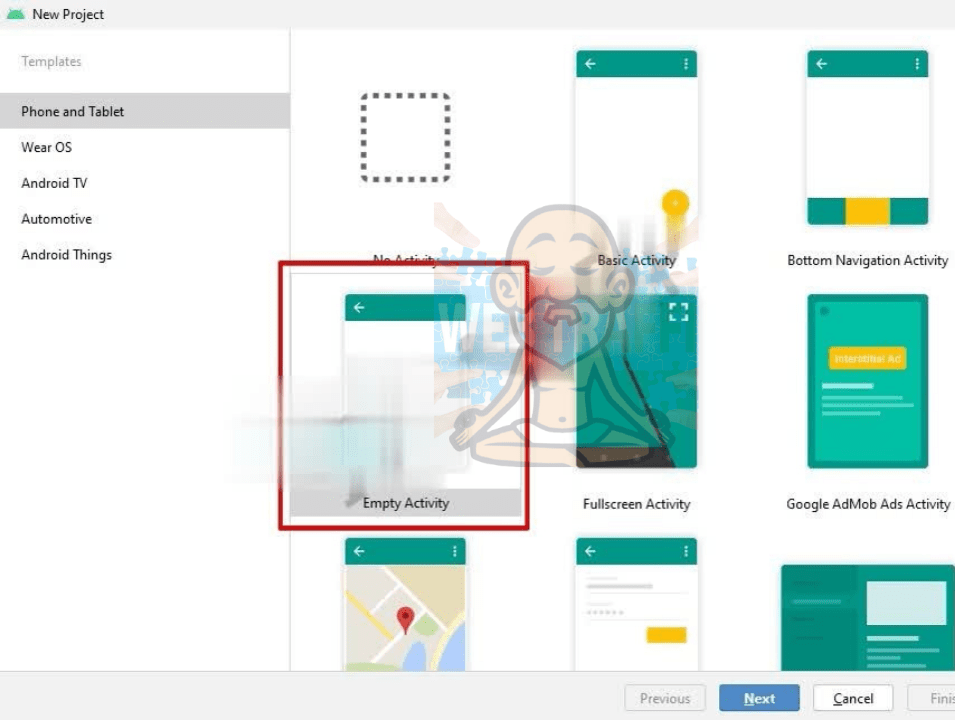
Click Next.
Name the project. Choose the programming language Java and the Minimum SDK (the minimum version of Android, which will support the application).
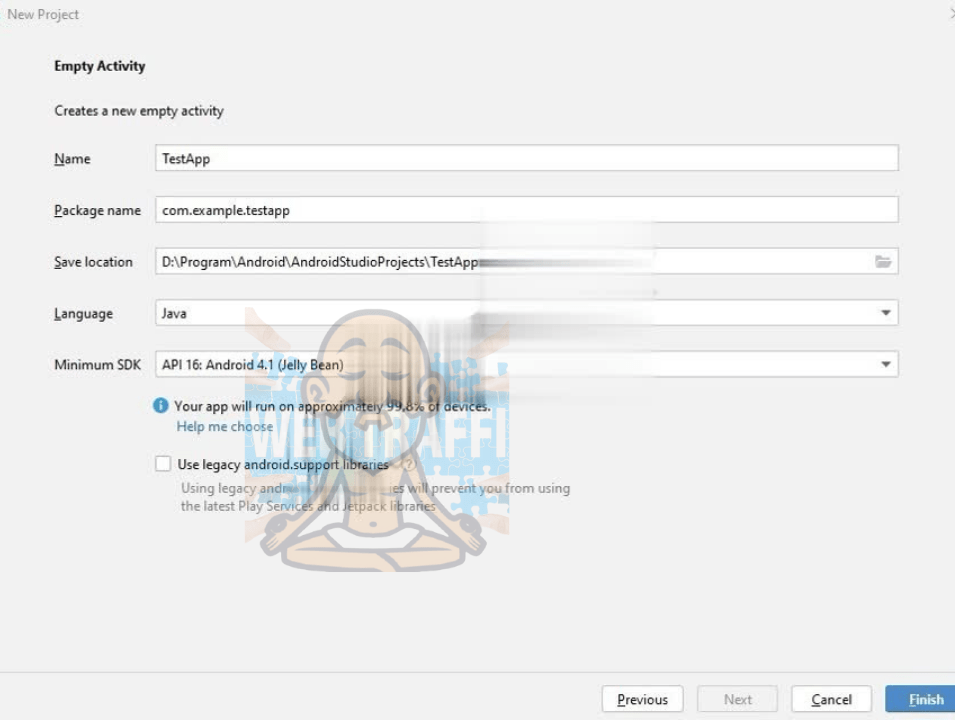
Press Finish.
Go to the manifest folder and open the file AndroidManifest.xml.
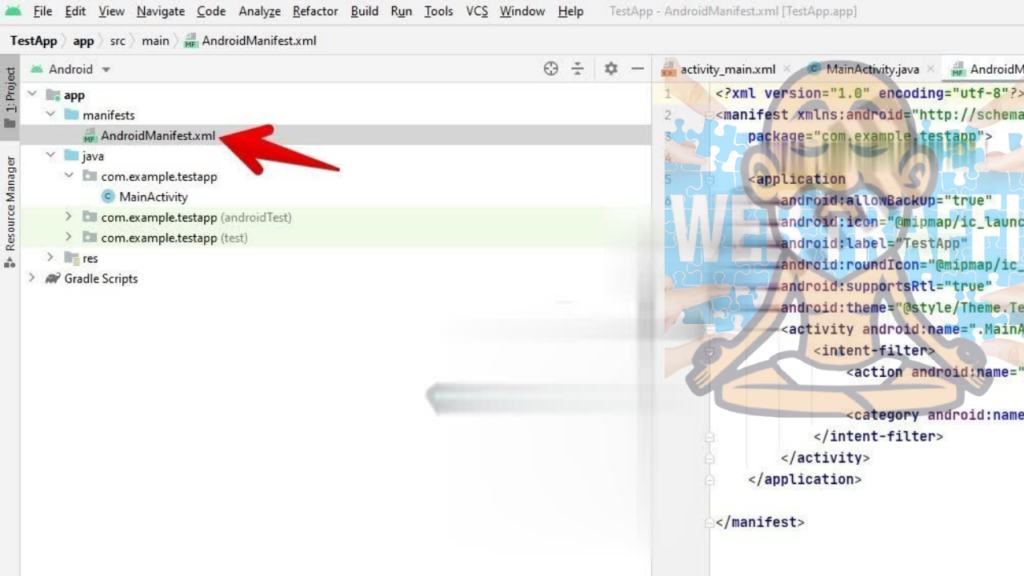
Prescribe permissions for access to the Internet.
Before application we write the code:
<uses-permission android:name="android.permission.INTERNET"/>Go to res → layout. Open the file activity_main.xml.
If there is no code, click Split in the upper right corner.
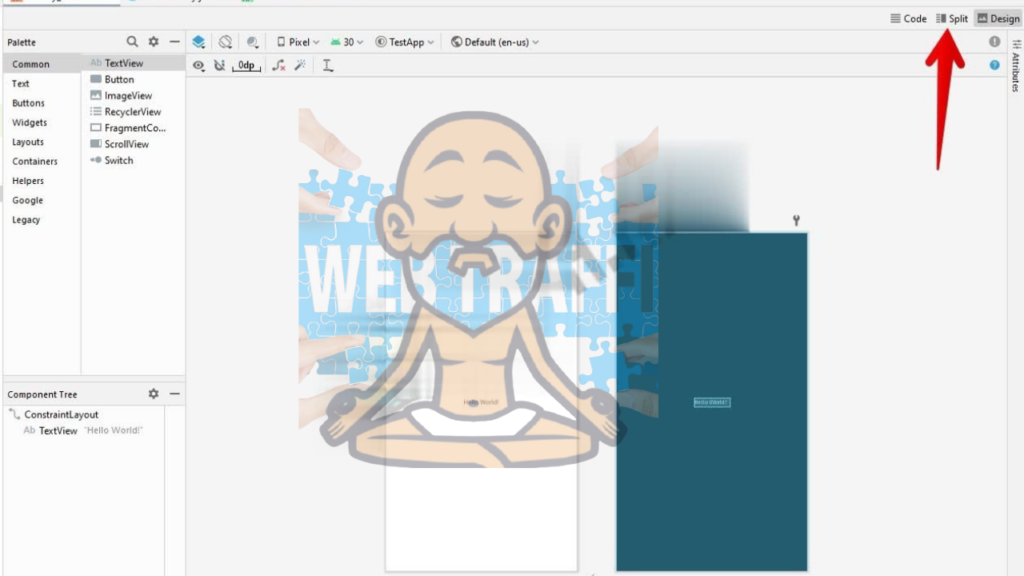
Remove the standard code text.

Insert the following code in its place:
<WebView
    android:id="@+id/webView"
    android:layout_width="match_parent"
    android:layout_height="match_parent"
    />
Find the MainActivity file in the java folder.
Insert the code inside the @Override method brackets:
WebView webView = findViewById(R.id.webView);

webView.getSettings().setJavaScriptEnabled(true);
webView.loadUrl("https://webtraffic.guru/");

WebViewClient webViewClient = new WebViewClient() {
    @SuppressWarnings("deprecation") @Override
    public boolean shouldOverrideUrlLoading(WebView view, String url) {
        view.loadUrl(url);
        return true;
    }

    @TargetApi(Build.VERSION_CODES.N) @Override
    public boolean shouldOverrideUrlLoading(WebView view, WebResourceRequest request) {
        view.loadUrl(request.getUrl().toString());
        return true;
    }

};
webView.setWebViewClient(webViewClient);
In the webView.loadUrl variable, insert the URL that will be opened in the application. For example,
ebView.loadUrl("https://webtraffic.guru/");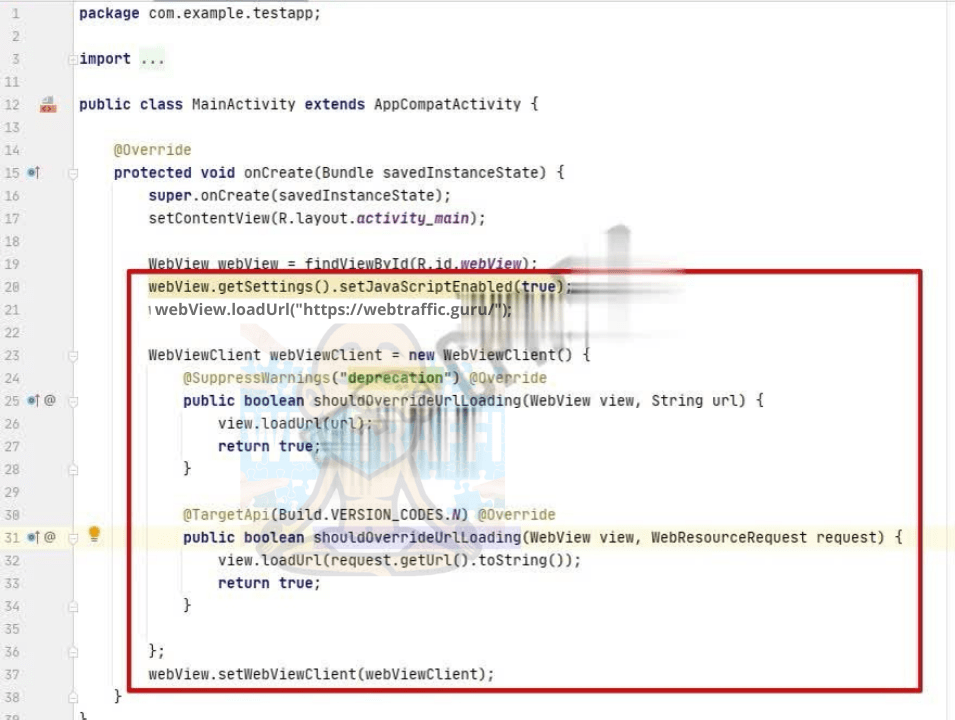
Open the file AndroidManifest.xml. At the end of the tag application write the following code:
android:configChanges="orientation|keyboardHidden|screenSize"It is needed so that when you rotate the screen the application is not updated.
If automatic import of classes is disabled, we do everything manually. Find the code fragments highlighted in red, move the cursor and click Import class in the table that pops up.
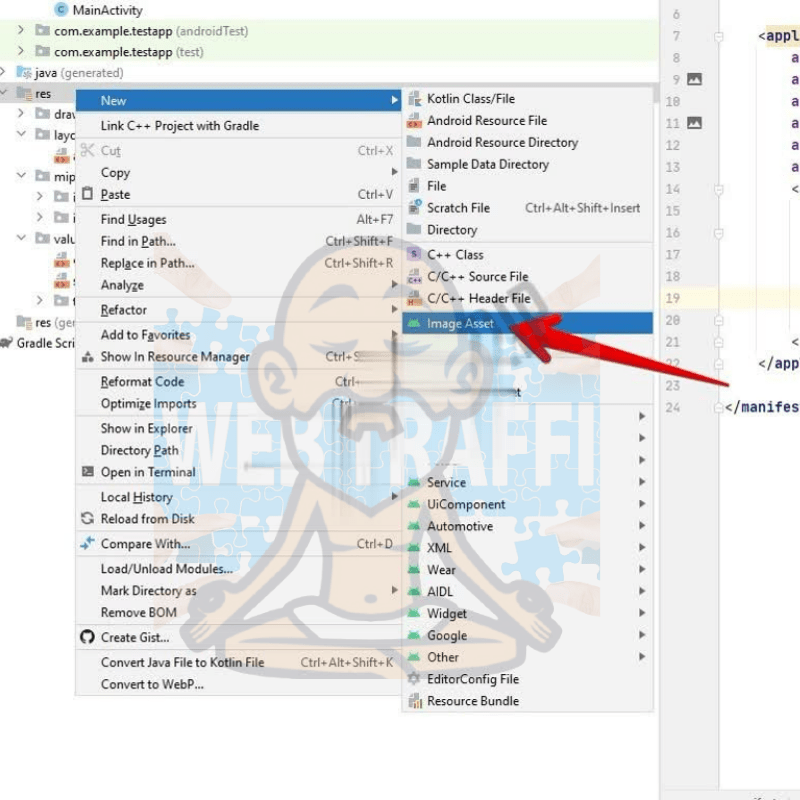
All the created applications have standard icons by default. To change them, right-click on the folder Res, select New and go to Image Asset.
In the Path column, click on the folder icon. Find the file you want to use as the application icon.
Click Next and Finish.
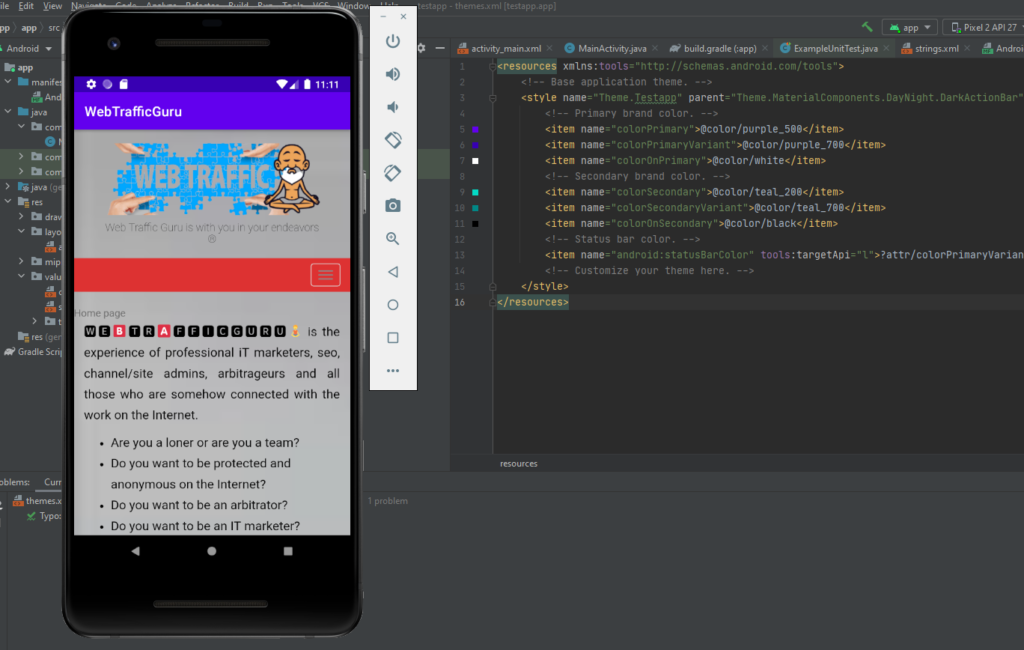
Now let’s see if the application works. Launch the emulator.

If all is well, the application will start.
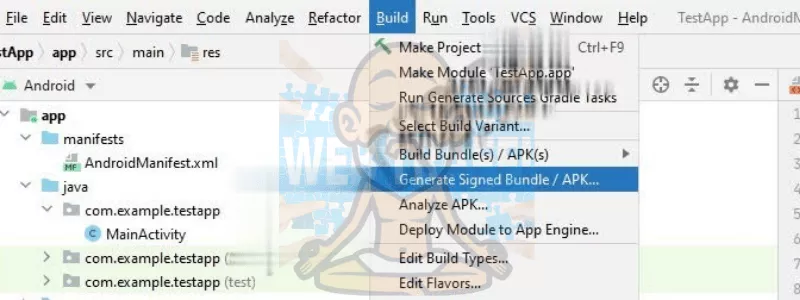
The simple WebView application is ready. Now let’s create an APK file.
In the menu click on Build and select Generate Signed Bundle/APK…
Select the APK and click Next.
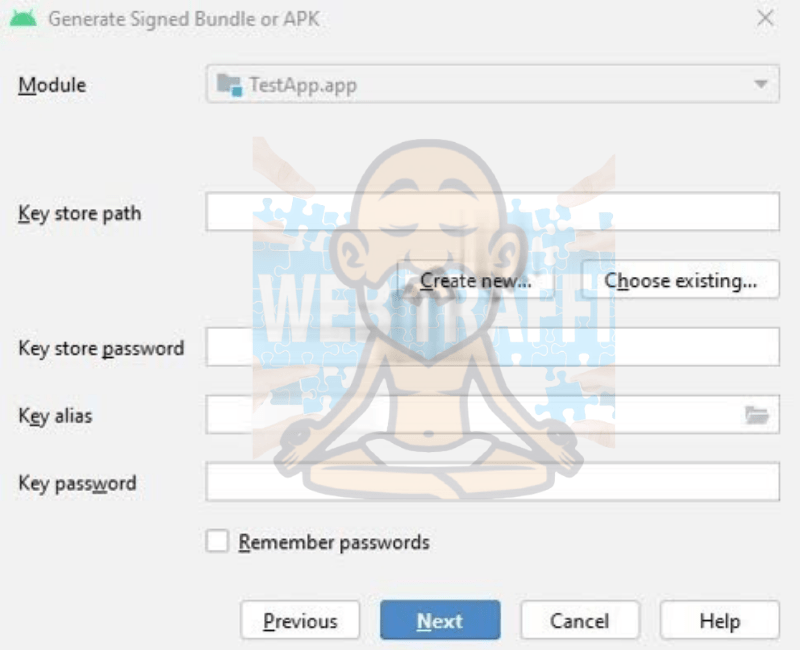
Create new in the Key store path fieldSince this is the first time we are creating an application, we need to create a key store file to sign the application. To do this, select Create new in the Key store path field.
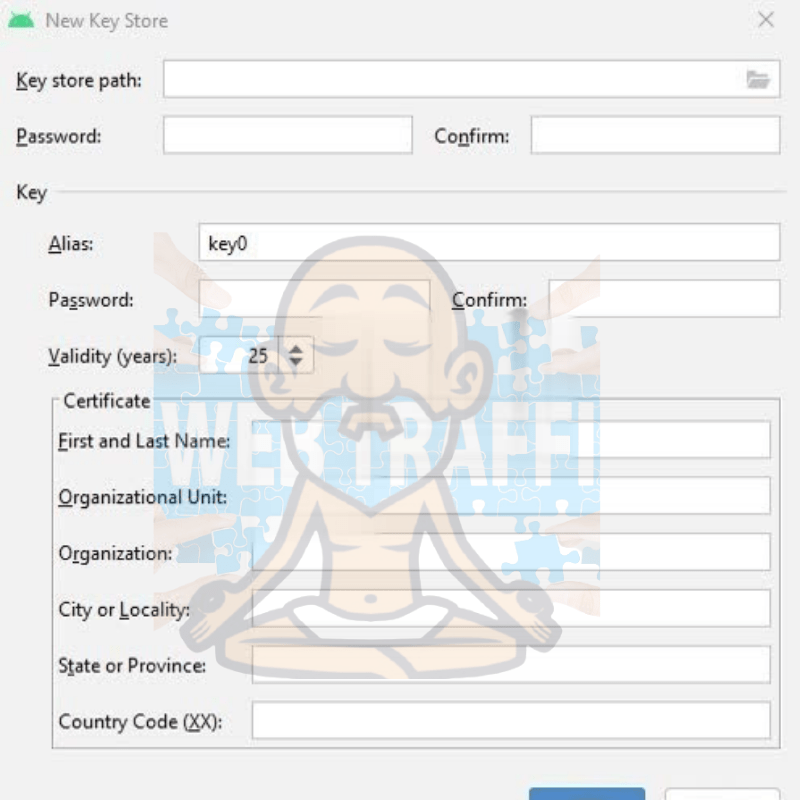
In the menu that opens, in the Key store path field, click on the folder on the right. Come up with a name. Next, specify the passwords.
Below fill in the name, surname, company name, organization, city, region, country code in the format XX.
Click on OK and Next.
In the Destination Folder field enter the path to save the APK-file. Below select release and check both checkboxes below.
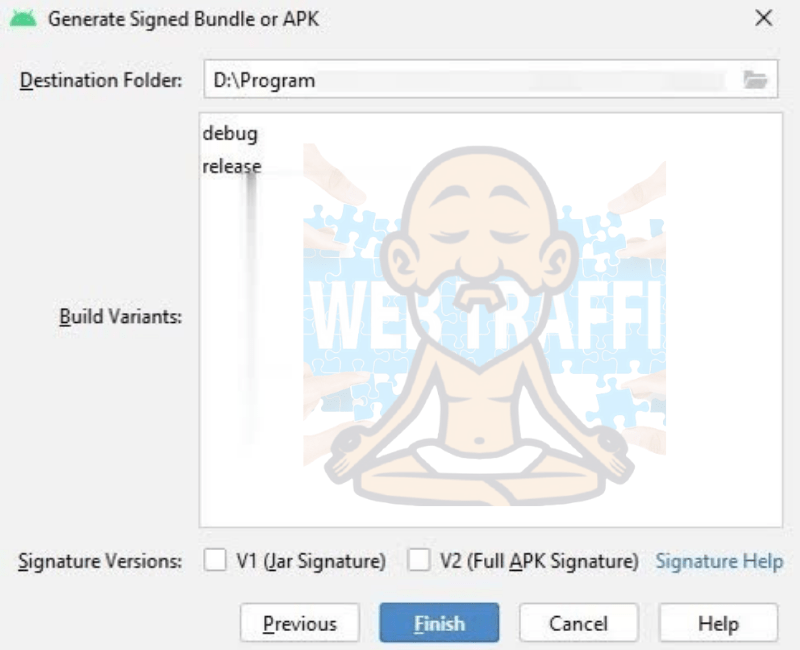
Press Finish.
Wait a few minutes. A notification will appear in the program that the APK file is ready.
The simple WebView application is ready to work.

In this article, we would like to give a more detailed description of what happens after a lead takes an action on the side of the affiliate platforms. If you don’t fully understand how the internal mechanism of affiliate platforms works, this article will help you understand all the processes and terms.
Immediately before payment, CPA networks and advertisers pre-check the quality of your leads. This procedure is necessary to rule out a breach of the offer’s rules. The verification period is called the conversion confirmation hold. Once the parties have completed the verification, the payout status will be updated.
Rules of the offer are always published in its description. If any leads don’t comply with the rules and don’t pass the check, no payouts are made for them. Therefore, you need to clearly comply with everything that is stated in the description of the offer.
When the verification is completed, the funds will still be unavailable to you. This period is called the payout hold. You will be able to withdraw funds when the advertiser confirms payment.
Different affiliates and offers have different hold periods, which you need to find out about in advance.
There are many factors that affect the holding period:
The conversion confirmation hold is directly dependent on the type. For example, single-click offers or SOI are often validated immediately. On the other hand, when it comes to CPS and other complex conversion types, other parameters come into play, including payment and shipping, cancelled orders, and more.
The main point to make is to always check the terms of the offerer. In practice hold can last up to 90 days, and in complex conversions and above this term. Hold on payments usually varies within a few days or months.
In the screenshot below you can see an example of payment terms. The term “Net” should be understood to mean the end of the month or the end of the contract period. That is, Net7 means the end of the month + 7 days.
In some affiliates you can find individual terms of cooperation. These terms depend directly on the quality of your traffic. If you have a good quality, you can count on improved conditions or additional benefits. For example, you may be offered access to some “closed” offers, improved payouts or less stringent caps.
A cap is a daily limit on the number of attracted leads. The higher the number – the better.
Show the affiliate that you have good traffic. If you are working with a normal network, it will also meet you halfway and be able to offer favorable terms. In particular, some affiliates offer a payout for every thousand leads, regardless of the terms.
Some of the offers involve additional checks, which are carried out by call centers. In such cases, payment deadlines can stretch out. One such example is technical problems on the part of the advertiser due to which he cannot track confirmations.
Remember that a complex flow equals more technical issues. And this, in turn, affects the timing of payments.
If the confirmation of the lead is done through the call center, you can see potential leads immediately, but the sale or deposit itself is often delayed.
Mixed type flow should be understood as a combination of several types: CPS, CPL, FTD, CPI, CPE, and others. Mixed flow has both pluses and minuses.
The main plus is the ability to get funds for both types of conversions. If this option is not available, you can target the first type, but receive payouts for the second.
On the other hand, this type of conversion requires more time to verify.

To summarize, I would like to draw attention to a few important points: